

In one line: Connect Facebook so your UnleashX agent can reply to people in Messenger from your Page — sending text, images, video, audio, or files without you opening the inbox.
1. Overview
Facebook Messenger is where a lot of customer conversation actually happens — questions about a product, order updates, support requests — all landing in your Page inbox. Once connected to UnleashX, your agent can send messages to a Messenger conversation on behalf of your Page: plain text, an image, a video, an audio clip, or a file attachment. It works against the Messenger Platform using your Page’s access, so it respects Meta’s messaging rules. Connecting Facebook to UnleashX means your agent can answer, follow up, and send collateral in the channel the customer already chose, instead of pushing them to email.2. What you’ll need
- A Facebook Page (Messenger works from a Page, not a personal profile).
- An admin role on that Page, or permission to authorize apps for it.
- An UnleashX account with access to Data Connectors.
You connect a Page, not your personal account. During authorization, pick the Page whose Messenger inbox the agent should send from.
3. Get your credentials
Facebook uses Meta OAuth. You do not create or paste an API key. UnleashX redirects you to Facebook, you sign in and select a Page, and Meta issues a Page access token to UnleashX automatically.1
Start the connection in UnleashX
In your agent’s Data Connectors, find Facebook and click Connect (see Section 4).
2
Sign in with Facebook
Sign in with an account that administers the Page.
3
Select the Page
Choose the Page whose Messenger conversations the agent should handle. If you manage several, select only the ones you want connected.
4
Review and approve the requested permissions
Click Continue to grant access and return to UnleashX.
There is no key to copy. Access is granted by your Facebook login and can be revoked anytime under Facebook Settings → Business Integrations.
4. Connect on UnleashX
1
Open your agent
Sign in at https://www.tryunleashx.com and open your agent.
2
Go to Data Connectors
In the agent, open Data Connectors.
3
Find Facebook and connect
Locate Facebook and click Connect / Add / Configure.
4
Authorize with Facebook
Click Authorize, sign in, select your Page, and approve the requested permissions.
5
Confirm success
You’ll return to UnleashX and the connector status will show a Connected badge.
Use Facebook in a Workflow
Once connected, you can add Facebook to any automation from the Workflows builder. Its tools appear in the Apps panel, marked with an MCP badge.1
Add a trigger node
Open Workflows → New Workflow. On the canvas, click + Add Trigger. In the Paths panel, open the Apps tab and select Facebook — its Triggers are listed underneath. Use the search box if you have many connectors.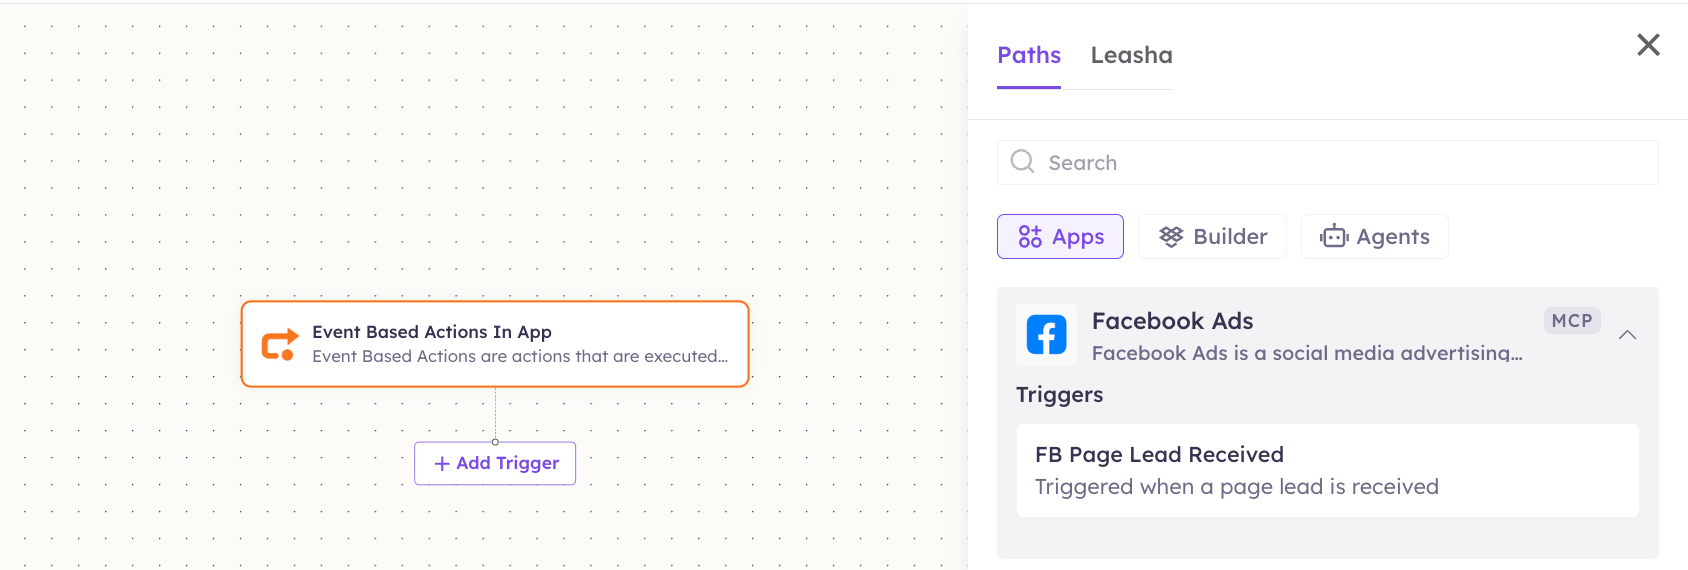
2
Add an action node
Click the + below any node to add a step, then pick Facebook again — this time the panel lists its Actions.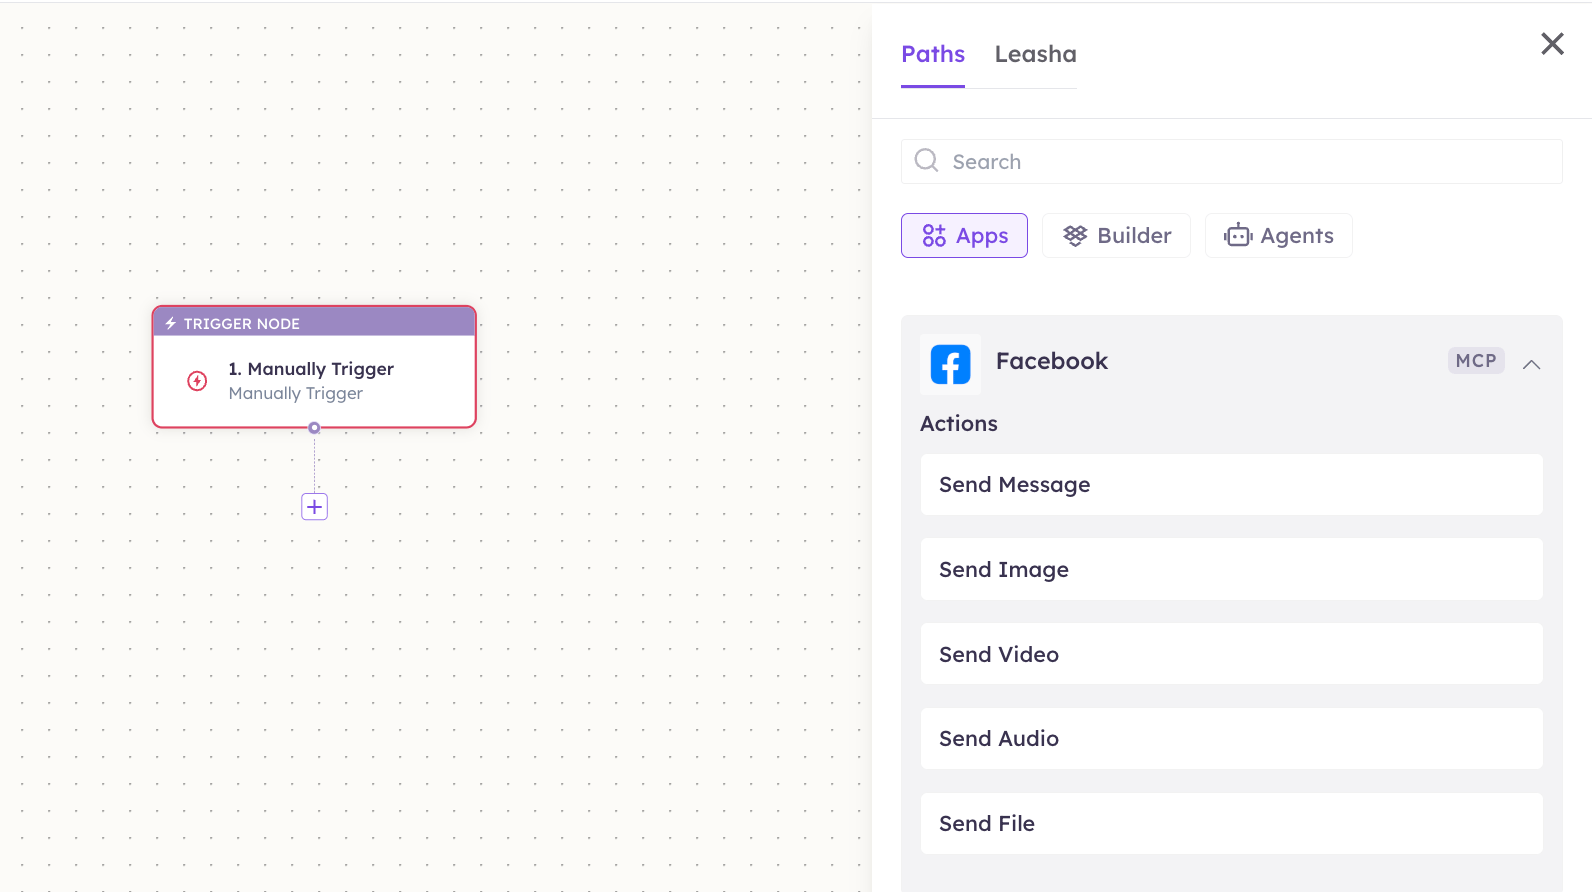
3
Configure the step
Fill in the fields for the trigger or action you picked. Required fields are marked with a red asterisk (*).
4
Add or select your account
Under Selected account, choose an already-connected account, or click Add Account to connect one now.
5
Save and test
Click Save. Use Test to verify the step, then toggle Publish when the workflow is ready.
The steps are the same for every connector. For the full workflow builder guide, see Using MCP in Workflows.
5. Available tools
Available triggers
Lead forms are a Facebook Ads/Page feature. To receive leads, the form must be published on the connected Page and your app authorized to read them.
6. Example usage
“Reply to that Messenger thread with our shipping policy and attach the returns PDF.” Runs Send Message, then Send File.
“When a customer asks for the setup guide, send them the walkthrough video.” A workflow routes the message and runs Send Video.
7. Permissions & data access
UnleashX can:- Send text, image, video, audio, and file messages from the connected Page.
- Receive leads submitted through your Page’s lead forms.
- Post to your Page timeline, or comment on posts.
- Message people who haven’t messaged your Page first.
- Send outside Meta’s 24-hour messaging window without an approved tag.
- Access your personal Facebook profile, friends, or Ads account.
8. Troubleshooting
For general connector issues, see /mcp/integrations.