

Gmail
In one line: Connect your Gmail account so your UnleashX agent can send, search, label, and triage email for you.
1. Overview
Gmail is Google’s email service, part of Google Workspace. It holds your inbox, sent mail, drafts, labels, and attachments. Once connected, your UnleashX agent can send emails (including CC/BCC and attachments), search and read messages, create and send drafts, apply or remove labels, and triage your inbox — marking messages read/unread, important, archived, or trashed. Connecting Gmail to UnleashX turns email into something your agent can act on directly: it can answer “did the invoice from Acme arrive?”, send a follow-up, or label and archive a thread — all from a natural-language request, so you spend less time clicking around your inbox.2. What you’ll need
1
A Google account with Gmail
Any personal Gmail account or a Google Workspace account with Gmail enabled.
2
Permission to grant access
You must be able to complete the Google sign-in and approve the requested permissions. On Workspace accounts, your admin may restrict third-party app access.
3
An UnleashX agent
An agent in your UnleashX workspace where you’ll add the Gmail connector.
No admin access? On personal Gmail you can connect yourself. On a managed Google Workspace account, your admin may need to allow UnleashX in the Google Admin console before the authorize step succeeds.
3. Get your credentials
Gmail uses Google OAuth 2.0. You do not create or paste an API key. Instead, UnleashX redirects you to Google, you sign in once, and Google issues an access token to UnleashX automatically.1
Start the connection in UnleashX
In your agent’s Data Connectors, find Gmail and click Connect (see Section 4). This launches Google’s secure sign-in page.
2
Sign in with Google
Choose the Google account whose Gmail you want to connect.
3
Review and approve the requested scopes
Google shows exactly what UnleashX is asking for. Click Allow to grant access. Google then sends you back to UnleashX and the connection completes.
There is no key to copy. Access is granted by your Google sign-in, and you can revoke it at any time from your Google Account permissions page.
4. Connect on UnleashX
1
Open your agent
Sign in at https://www.tryunleashx.com and open the agent you want to give email access to.
2
Go to Data Connectors
In the agent, open Data Connectors.
3
Find Gmail and connect
Locate Gmail and click Connect / Add / Configure.
4
Authorize with Google
Click Authorize, sign in with Google, and approve the requested permissions.
5
Confirm success
You’ll return to UnleashX and the connector status will show a Connected badge.
Use Gmail in a Workflow
Once connected, you can add Gmail to any automation from the Workflows builder. Its triggers and tools appear in the Apps panel, marked with an MCP badge.1
Add a trigger node
Open Workflows → New Workflow. On the canvas, click + Add Trigger. In the Paths panel, open the Apps tab and select Gmail — its Triggers are listed underneath. Use the search box if you have many connectors.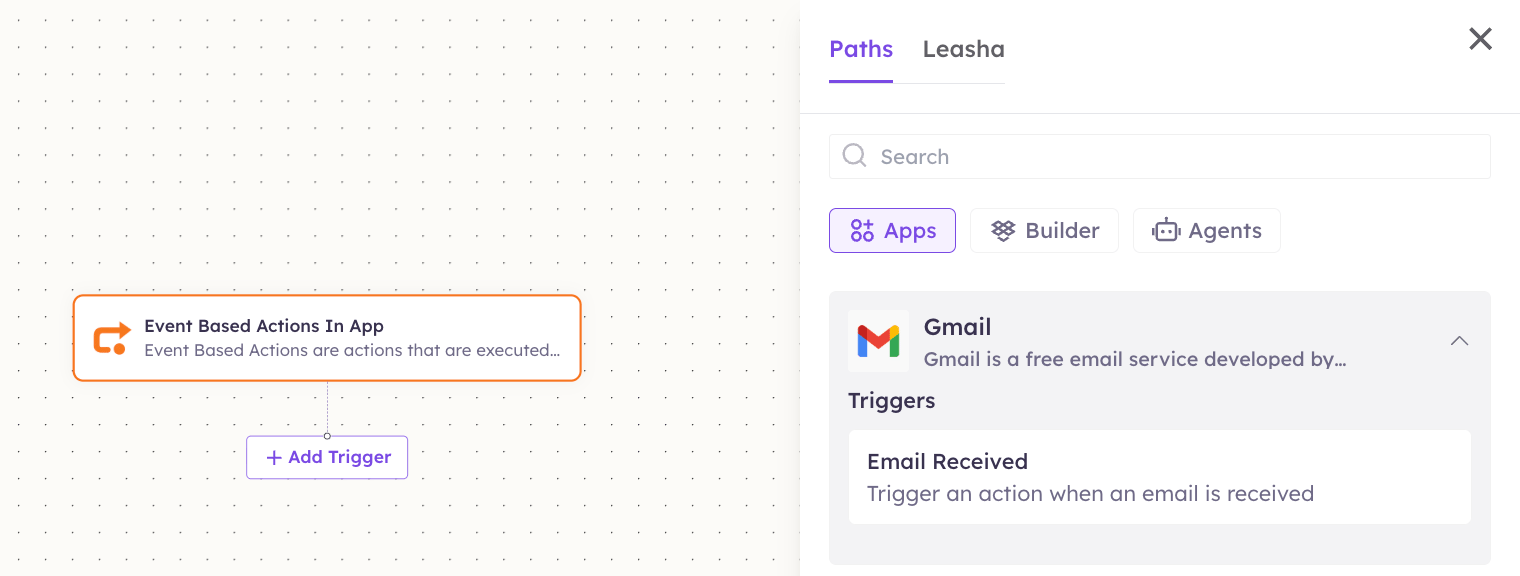
2
Add an action node
Click the + below any node to add a step, then pick Gmail again — this time the panel lists its Actions.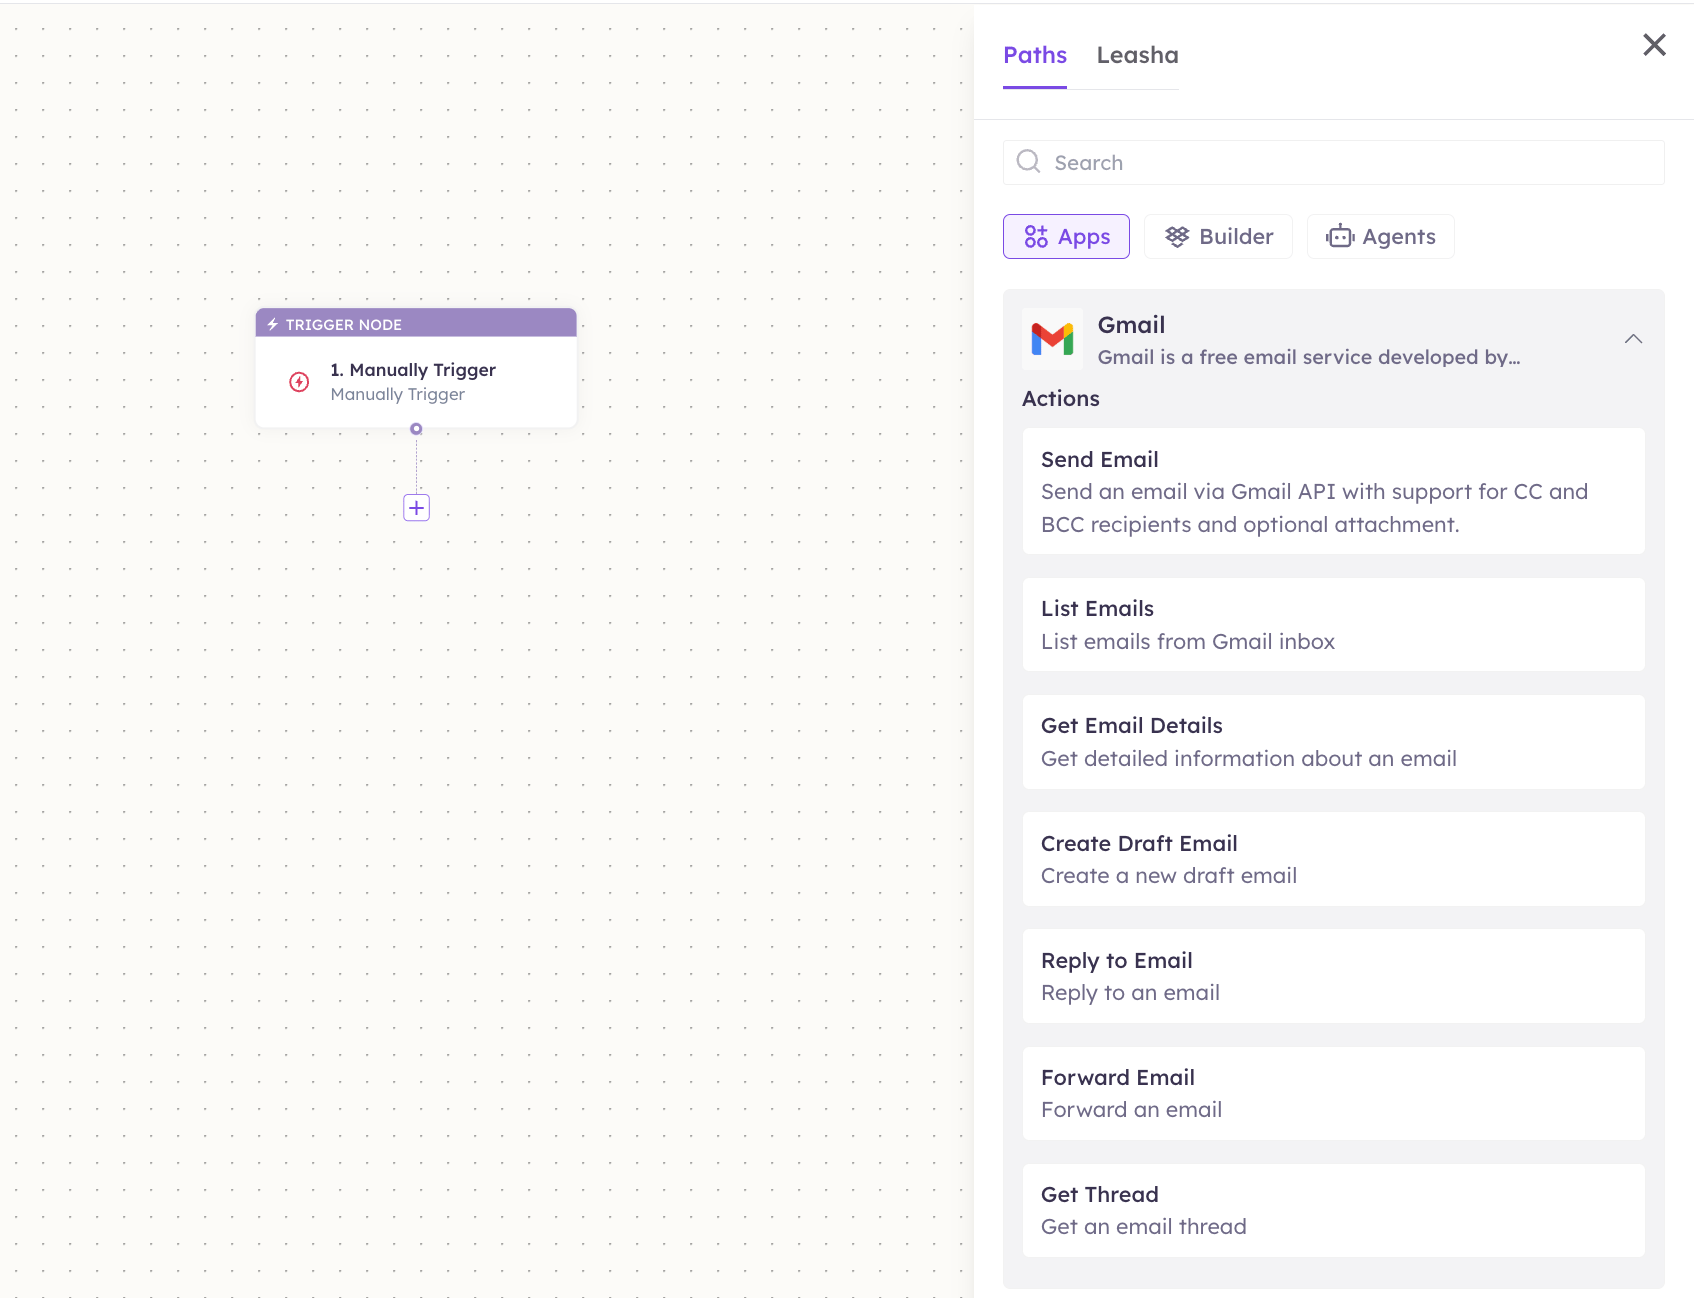
3
Configure the step
Fill in the fields for the trigger or action you picked. Required fields are marked with a red asterisk (*).
4
Add or select your account
Under Selected account, choose an already-connected account, or click Add Account to connect one now.
5
Save and test
Click Save. Use Test to verify the step, then toggle Publish when the workflow is ready.
The steps are the same for every connector. For the full workflow builder guide, see Using MCP in Workflows.
5. Available tools
6. Example usage
“Send an email to maria@acme.com with the subject ‘Q3 report’ and attach the file at this link.” Runs Send Email with URL Attachment (or Send Email if there’s no attachment).
“Find the unread emails from billing and mark them as read.” Runs Search Emails to find them, then Mark as Read on each.
7. Permissions & data access
UnleashX can:- Send emails and send your drafts.
- Read messages and search your mailbox.
- Create drafts and labels.
- Apply/remove labels and mark messages read, unread, important, archived, or trashed.
- Permanently delete email (trashing is reversible via untrash).
- Change your Gmail account password or security settings.
- Access other Google services unless you connect those integrations separately.
access-token header, a gmail_access_token header, or an Authorization: Bearer header, falling back to your UnleashX session), and refreshes it automatically when it expires.
8. Troubleshooting
For general connector issues, see /mcp/integrations.