

Zoho Meet
In one line: Connect Zoho Meet so your UnleashX agent can schedule meetings and webinars, pull the registration URL, and check who’s attending — all in plain language.
1. Overview
Zoho Meet (Zoho Meeting) is Zoho’s online meeting and webinar service. It covers both quick internal calls and registration-based webinars with attendee tracking. Once connected to UnleashX, your agent can create a meeting, create a webinar, retrieve a webinar’s join or registration URL, and look up the attendees registered for a session. It works against your live Zoho Meeting account, so it respects your plan’s participant and session limits. Connecting Zoho Meet to UnleashX turns scheduling into a step in a workflow: a lead qualifies, a campaign launches, a support case escalates — and the agent creates the session and hands back the link.2. What you’ll need
- A Zoho account with Zoho Meeting enabled.
- Permission to authorize third-party apps for your Zoho organization.
- An UnleashX account with access to Data Connectors.
Zoho is region-partitioned (
.com, .in, .eu, .com.au, and others). Sign in on the same data center your Zoho Meeting account lives on, or authorization will succeed but API calls will fail.3. Get your credentials
Zoho Meet uses Zoho OAuth 2.0. You do not create or paste an API key. UnleashX redirects you to Zoho, you sign in once, and Zoho issues an access token to UnleashX automatically.1
Start the connection in UnleashX
In your agent’s Data Connectors, find Zoho Meet and click Connect (see Section 4).
2
Sign in to Zoho
Choose the Zoho account that hosts your meetings. Make sure you’re on the correct regional domain.
3
Review and approve the requested scopes
Click Accept to grant access and return to UnleashX.
There is no key to copy. Access is granted by your Zoho sign-in and can be revoked anytime under Zoho Accounts → Security → Connected Apps.
4. Connect on UnleashX
1
Open your agent
Sign in at https://www.tryunleashx.com and open your agent.
2
Go to Data Connectors
In the agent, open Data Connectors.
3
Find Zoho Meet and connect
Locate Zoho Meet and click Connect / Add / Configure.
4
Authorize with Zoho
Click Authorize, sign in to Zoho, and approve the requested permissions.
5
Confirm success
You’ll return to UnleashX and the connector status will show a Connected badge.
Use Zoho Meet in a Workflow
Once connected, you can add Zoho Meet to any automation from the Workflows builder. Its tools appear in the Apps panel, marked with an MCP badge.1
Add a trigger node
Open Workflows → New Workflow. On the canvas, click + Add Trigger. In the Paths panel, open the Apps tab and select Zoho Meet — its Triggers are listed underneath. Use the search box if you have many connectors.
2
Add an action node
Click the + below any node to add a step, then pick Zoho Meet again — this time the panel lists its Actions.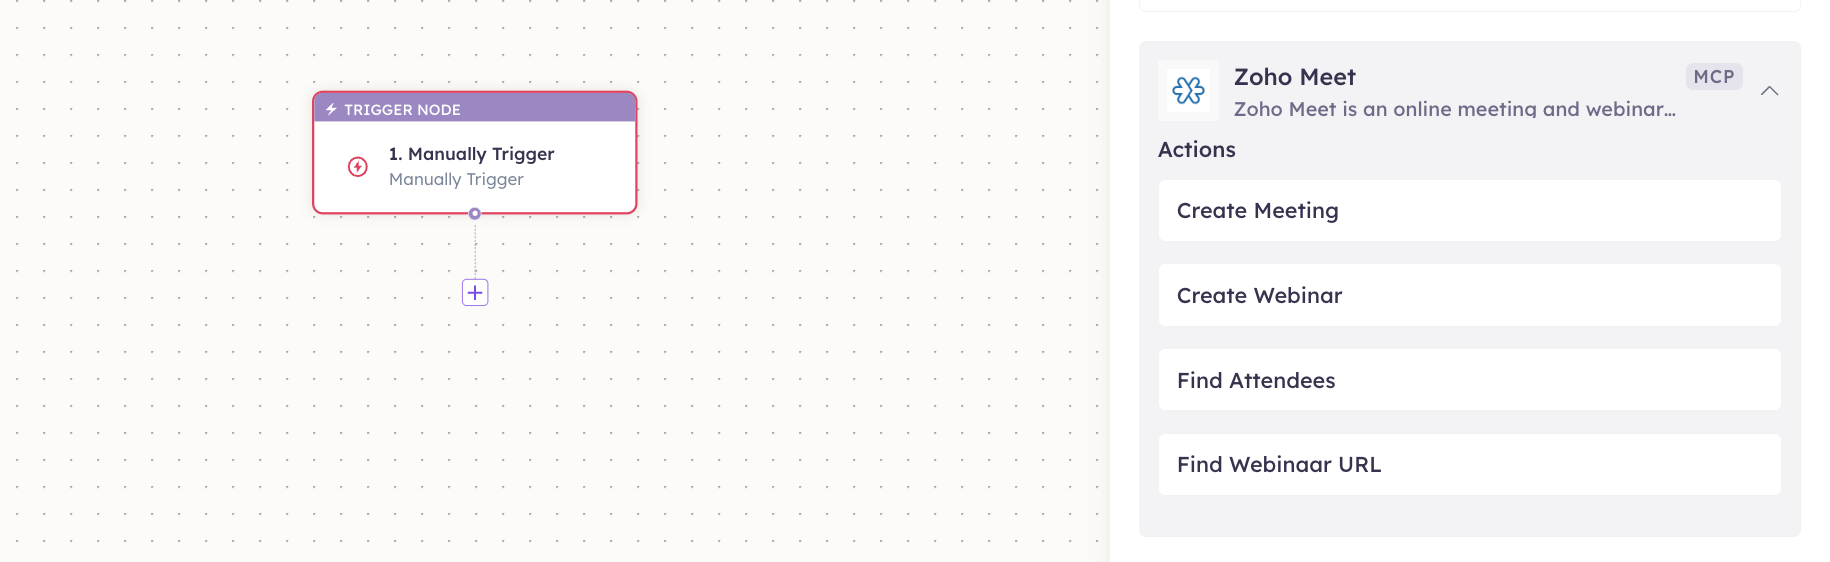
3
Configure the step
Fill in the fields for the trigger or action you picked. Required fields are marked with a red asterisk (*).
4
Add or select your account
Under Selected account, choose an already-connected account, or click Add Account to connect one now.
5
Save and test
Click Save. Use Test to verify the step, then toggle Publish when the workflow is ready.
The steps are the same for every connector. For the full workflow builder guide, see Using MCP in Workflows.
5. Available tools
6. Example usage
“Create a Zoho webinar called ‘Product Launch’ next Thursday at 4pm and give me the registration link.” Runs Create Webinar, then Find Webinar URL.
“Who’s registered for the Product Launch webinar?” Runs Find Attendees.
7. Permissions & data access
UnleashX can:- Create meetings and webinars on the connected Zoho account.
- Read a webinar’s join/registration URL.
- List registrants and attendees for a session.
- Join, record, or transcribe sessions.
- Exceed your Zoho Meeting plan’s participant or session limits.
- Access Zoho CRM, Desk, or Mail unless connected separately.
- Change your Zoho account settings or billing.
8. Troubleshooting
For general connector issues, see /mcp/integrations.