

WhatsApp Web
In one line: Link your personal WhatsApp by scanning a QR code, then let your UnleashX agent send WhatsApp messages straight from your own number — no developer account or API key needed.
1. Overview
WhatsApp Web lets you use your normal WhatsApp account from another device by linking it — the same way the official WhatsApp Web and Desktop apps work. UnleashX uses a WhatsApp Web gateway so your agent can send messages from the number already on your phone. Once linked, your agent can send WhatsApp text messages to any contact directly from your account — no business verification, no template approvals, and no API credentials to manage. Connecting WhatsApp Web to UnleashX is the fastest way to let an agent message people on WhatsApp using your existing number. You link your phone once by scanning a QR code, and the session stays connected until you unlink it.2. What you’ll need
- A phone with WhatsApp installed and active on the number you want to send from.
- Your phone online and able to scan a QR code.
- That’s it — there’s no account to create, no API key, and no admin approval needed.
Because linking is done from your own phone, you don’t need admin rights anywhere. Anyone with the phone can complete the pairing.
3. Link your WhatsApp (QR code pairing)
There is no API key and no OAuth for this connector. You authenticate by scanning a QR code with your phone — exactly like signing in to WhatsApp Web in a browser.1
Start the connection in UnleashX
In your agent, open Data Connectors → WhatsApp Web → Connect. UnleashX displays a QR code.
2
Open the linked devices screen on your phone
On your phone, open WhatsApp → Settings → Linked Devices → Link a Device. (On Android: ⋮ menu → Linked devices.)
3
Scan the QR code
Point your phone’s camera at the QR code shown in UnleashX. WhatsApp links the session within a few seconds.
4
Keep your phone connected
Your phone needs to come online periodically to keep the linked session alive, just like WhatsApp Web.
No scopes or permissions to choose. WhatsApp Web pairing does not use OAuth scopes — linking a device grants the session the ability to send and receive messages on your account, and there is no granular permission list to review. This is an honest limitation of the QR-pairing model.
4. Connect on UnleashX
1
Open your agent
Sign in at https://www.tryunleashx.com and open the agent you want to connect.
2
Go to Data Connectors
Open Data Connectors inside the agent.
3
Find WhatsApp Web and Connect
Locate WhatsApp Web and click Connect / Add / Configure to show the QR code.
4
Scan with your phone
Follow the QR pairing steps in Section 3 to link your phone.
5
Confirm it's connected
Once linked, the connector shows a Connected badge. Your agent can now send WhatsApp messages from your number.
Use WhatsApp Web in a Workflow
Once connected, you can add WhatsApp Web to any automation from the Workflows builder. Its triggers and tools appear in the Apps panel, marked with an MCP badge.1
Add a trigger node
Open Workflows → New Workflow. On the canvas, click + Add Trigger. In the Paths panel, open the Apps tab and select WhatsApp Web — its Triggers are listed underneath. Use the search box if you have many connectors.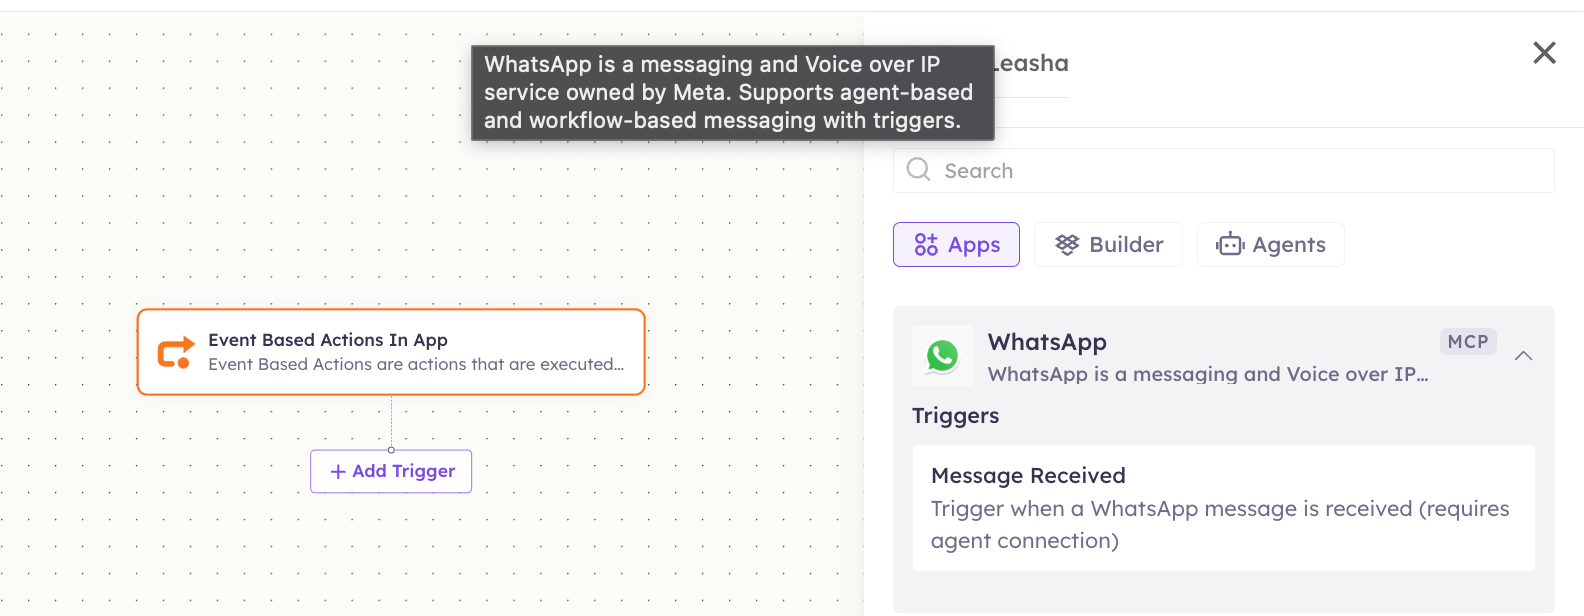
2
Add an action node
Click the + below any node to add a step, then pick WhatsApp Web again — this time the panel lists its Actions.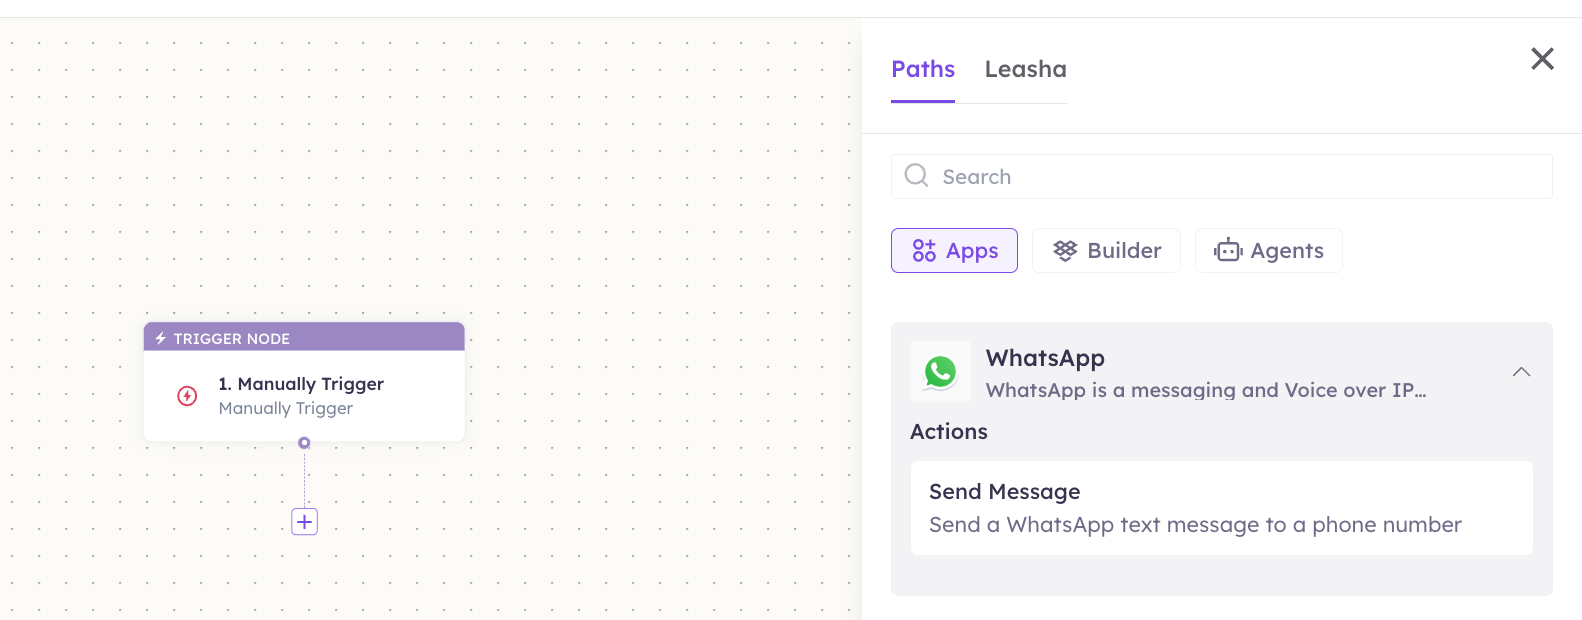
3
Configure the step
Fill in the fields for the trigger or action you picked. Required fields are marked with a red asterisk (*).
4
Add or select your account
Under Selected account, choose an already-connected account, or click Add Account to connect one now.
5
Save and test
Click Save. Use Test to verify the step, then toggle Publish when the workflow is ready.
The steps are the same for every connector. For the full workflow builder guide, see Using MCP in Workflows.
5. Available tools
6. Example usage
“Message 9876543210 saying ‘Running 10 minutes late, see you soon!’” Behind the scenes: Send Message (UnleashX sends the text via your linked WhatsApp Web session). “Send my colleague on +91 90000 11111 the meeting link.” Behind the scenes: Send Message (delivered from your own WhatsApp number).7. Permissions & data access
UnleashX CAN:- Send WhatsApp text messages from your linked number through the gateway session.
- Send messages once you unlink the device or your session expires.
- Access your full chat archive, contacts list, or media library through this connector (it is send-only).
- Verify a business identity or send approved templates (that’s the WhatsApp Business connector).
8. Troubleshooting
For general connector issues, see /mcp/integrations.
9. Frequently asked questions
Do I need a WhatsApp Business account or API key? No. This connector links your existing personal WhatsApp via QR code — there’s nothing to register and no key to manage. How is this different from WhatsApp Business? WhatsApp Business uses Meta’s official Cloud API (with templates, verification, and higher limits). WhatsApp Web links your normal number for simple, low-volume sending. Use Business for compliant, large-scale messaging. Can multiple people connect? Each connection links one phone/number. Different users can each link their own WhatsApp account to their own agent. Is my message data stored? UnleashX sends messages on demand through the gateway. This connector is send-only and does not pull your chat history into UnleashX.10. References
- WhatsApp Web / linked devices help: https://faq.whatsapp.com/general/download-and-installation/about-linked-devices
- How to link a device: https://faq.whatsapp.com/378279804439436
- WhatsApp Business (official API) alternative: https://business.whatsapp.com/products/business-platform