

Zoom
In one line: Connect Zoom so your UnleashX agent can schedule, update, and cancel meetings and webinars, share join links, and fetch recordings and participant lists — all in plain language.
1. Overview
Zoom is the video-meetings platform your team uses for calls, webinars, and recorded sessions. Behind each meeting is a schedule, an invite link, a participant list, and — when recorded — a cloud recording. Once connected to UnleashX, your agent can create and update meetings and webinars, list what’s on your calendar, generate and share join links, register attendees, and pull cloud recordings and participant reports. It acts through your own Zoom sign-in, so it respects your Zoom role and plan limits. Connecting Zoom to UnleashX means meetings organize themselves as you talk. Instead of opening Zoom to schedule a call or hunt for a recording, you tell your agent and it sets up the meeting, shares the link, or fetches the recording for you.2. What you’ll need
- A Zoom account (Basic works for meetings; webinars and cloud recording require a paid plan/add-on).
- Permission on your Zoom account to schedule meetings/webinars and access recordings.
- An UnleashX account with access to Data Connectors.
No API key to paste. Zoom uses OAuth — you click Authorize and sign in with Zoom.
3. Get your credentials
There’s no key to copy. Authentication runs through Zoom’s secure OAuth sign-in.1
Start the connection in UnleashX
Connecting Zoom (Section 4) opens a Zoom Authorize window.
2
Sign in with Zoom
Sign in with your Zoom account at
https://zoom.us/signin. Complete two-factor authentication if prompted.3
Review and allow the scopes
Zoom shows the access UnleashX is requesting (see the scopes table). Click Allow.
4
Return to UnleashX
Zoom redirects you back automatically and the connector links to your account. Behind the scenes UnleashX calls Zoom with a
Bearer token — you never handle the token yourself.Zoom shows exactly which permissions UnleashX is asking for on the Allow screen. Zoom — not UnleashX — enforces these limits and your plan.
4. Connect on UnleashX
1
Open your agent
Go to https://www.tryunleashx.com and open the agent you want to connect.
2
Open Data Connectors
Inside the agent, go to Data Connectors.
3
Find Zoom
Locate Zoom and click Connect (or Add / Configure).
4
Authorize with Zoom
Click Authorize, sign in with Zoom, and click Allow.
5
Confirm success
You return to UnleashX and the Zoom connector shows a Connected badge.
Use Zoom in a Workflow
Once connected, you can add Zoom to any automation from the Workflows builder. Its triggers and tools appear in the Apps panel, marked with an MCP badge.1
Add a trigger node
Open Workflows → New Workflow. On the canvas, click + Add Trigger. In the Paths panel, open the Apps tab and select Zoom — its Triggers are listed underneath. Use the search box if you have many connectors.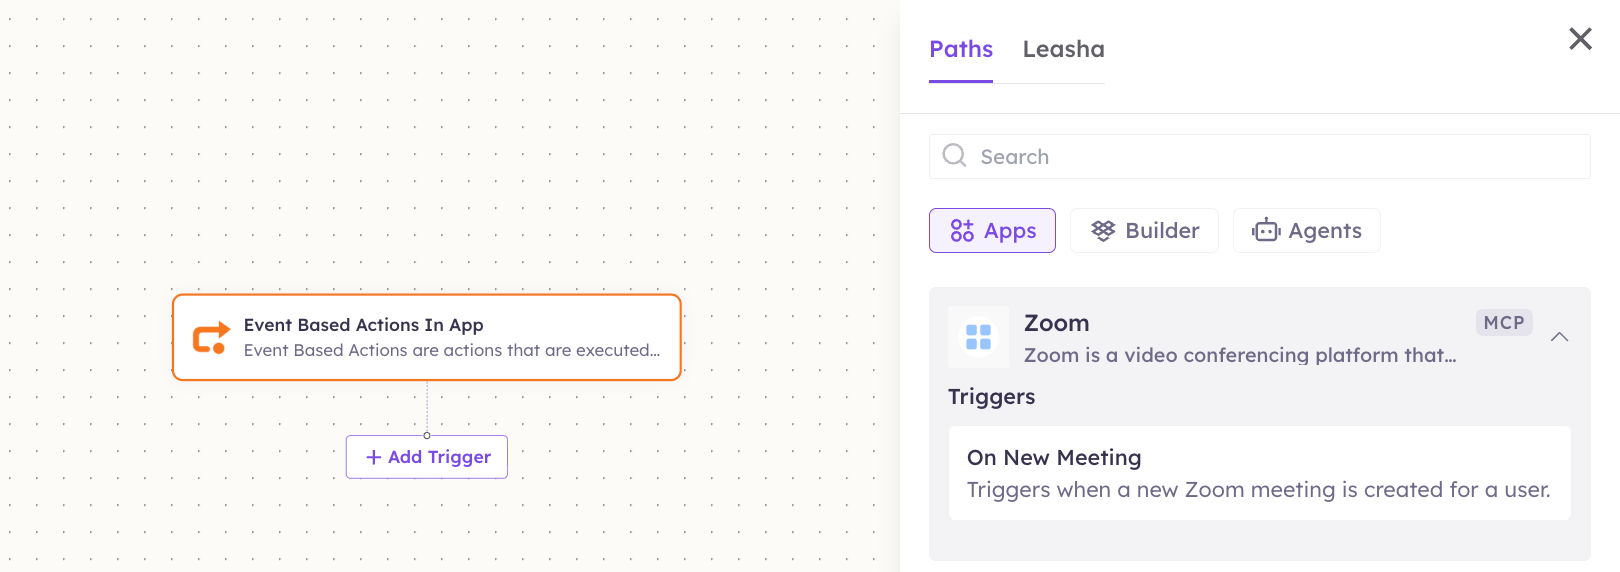
2
Add an action node
Click the + below any node to add a step, then pick Zoom again — this time the panel lists its Actions.
3
Configure the step
Fill in the fields for the trigger or action you picked. Required fields are marked with a red asterisk (*).
4
Add or select your account
Under Selected account, choose an already-connected account, or click Add Account to connect one now.
5
Save and test
Click Save. Use Test to verify the step, then toggle Publish when the workflow is ready.
The steps are the same for every connector. For the full workflow builder guide, see Using MCP in Workflows.
5. Available tools
6. Example usage
“Schedule a 30-minute product demo with the Acme team next Tuesday at 2pm and send me the join link.” → Runs Create Meeting for the specified time, then returns the meeting’s join URL. “Get the cloud recording from yesterday’s onboarding call and the list of who attended.” → Runs List Recordings (or Get Meeting Recording) for the download link, then Get Meeting Participants for the attendee report.7. Permissions & data access
UnleashX can:- List and read your meetings and webinars, and their join links.
- Create, update, and cancel meetings and webinars, and register attendees.
- List and fetch cloud recordings and participant reports.
- Delete meetings and recordings (these tools are clearly marked ⚠️).
- Use features your Zoom plan doesn’t include (e.g. webinars without the add-on).
- Access other users’ meetings or recordings unless your role permits it.
- Change account-wide Zoom admin settings or your password.
https://marketplace.zoom.us/user/installed). Disconnecting revokes access immediately.
8. Troubleshooting
For general MCP issues, see /mcp/integrations.
9. Frequently asked questions
Does the agent schedule meetings as me? Yes. Meetings and webinars are created under your own Zoom account, with you as the host. Is my meeting data stored by UnleashX? No. UnleashX reads and writes through the Zoom API live per request; it doesn’t keep a copy of your meetings or recordings. Can the agent access cloud recordings? Yes, if cloud recording is enabled on your plan and the meeting was recorded. Recordings stored only locally aren’t accessible via the API. Can I connect a webinar without a paid plan? No — webinars require the Zoom Webinar add-on. Meeting tools work on Basic accounts.10. References
- Zoom API reference: https://developers.zoom.us/docs/api/
- Zoom OAuth guide & scopes: https://developers.zoom.us/docs/integrations/oauth/
- Zoom OAuth scopes reference: https://developers.zoom.us/docs/integrations/oauth-scopes/
- Manage installed apps / revoke access: https://marketplace.zoom.us/user/installed