

Asana
In one line: Connect Asana so your UnleashX agent can create and update tasks, move work across projects and sections, add comments, and check on progress — all in plain language.
1. Overview
Asana is a work-management platform where teams organize projects, tasks, and deadlines. Your workspace holds the projects, tasks, sections, and comments that track who’s doing what by when. Once connected to UnleashX, your agent can create and update tasks, assign them, set due dates, move tasks between sections and projects, add comments, and list what’s outstanding. It works against your live Asana account using a personal access token, so it acts with your own permissions. Connecting Asana to UnleashX means your task board keeps itself current as you talk. Instead of opening Asana to file a task or reassign work, you tell your agent and it makes the change.2. What you’ll need
- An Asana account with access to the workspace and projects you want the agent to manage.
- A personal access token (see Section 3).
- An UnleashX account with access to Data Connectors.
You paste a personal access token. UnleashX sends it to the Asana API as a
Bearer credential.3. Get your credentials
Asana MCP authenticates with a personal access token (PAT) — a secret string tied to your Asana user that you create in Asana’s developer console. There’s no app to publish and no review process; a PAT works immediately.Step-by-step
1
Sign in to Asana
Go to app.asana.com and sign in with the account whose access you want the agent to have. The token inherits that user’s workspaces and project permissions.
2
Open Settings
Click your profile picture in the top-right corner, then choose Settings. A settings dialog opens with a left-hand list: Profile, Notifications, Email Forwarding, Account, Display, Apps, and Hacks.
3
Open the Apps tab
Click Apps in that list. The tab shows Authorized Apps at the top (empty until you connect something), then Discover new apps with suggestions like Slack, Gmail Add-on, and Microsoft Teams.Scroll past those to the bottom.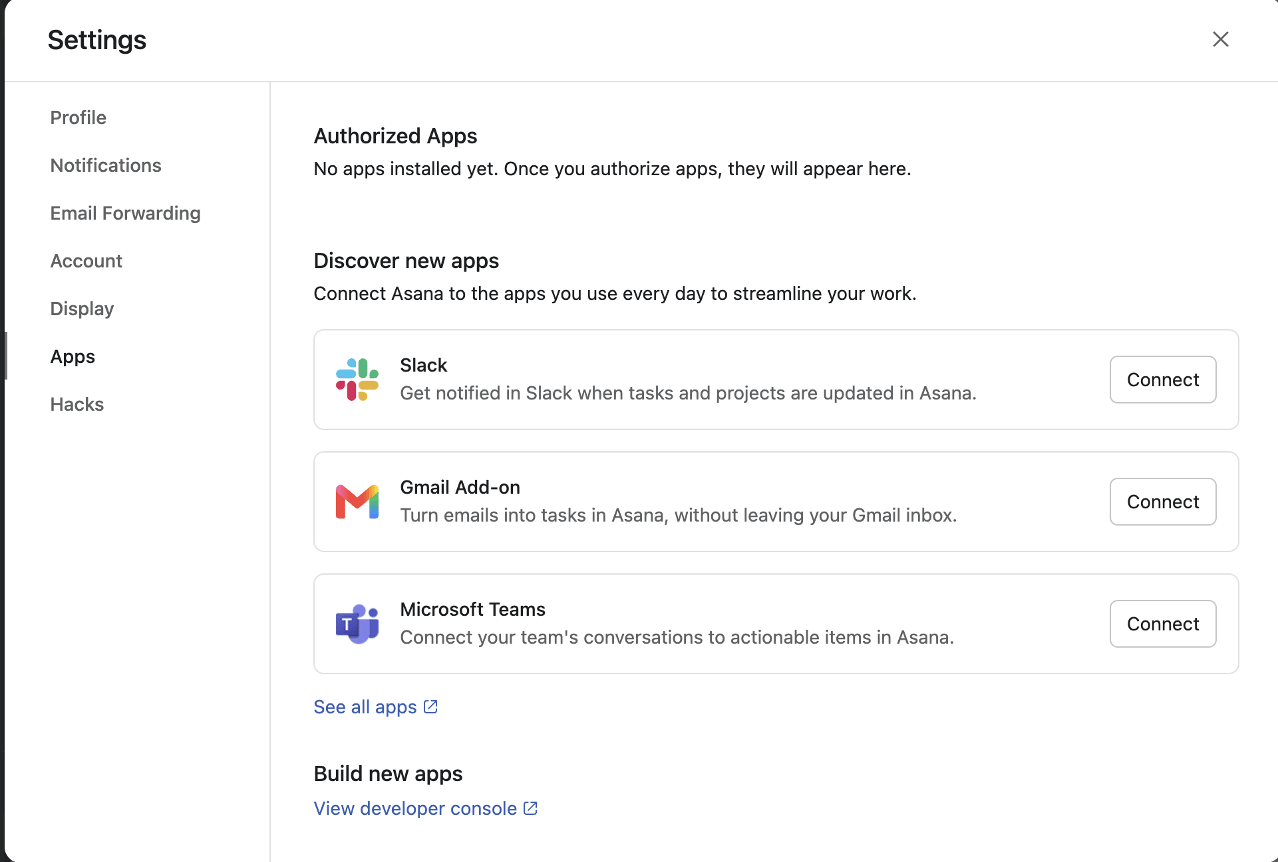
4
Open the developer console
Under the Build new apps heading at the bottom, click View developer console. It opens the Asana Developers site in a new tab.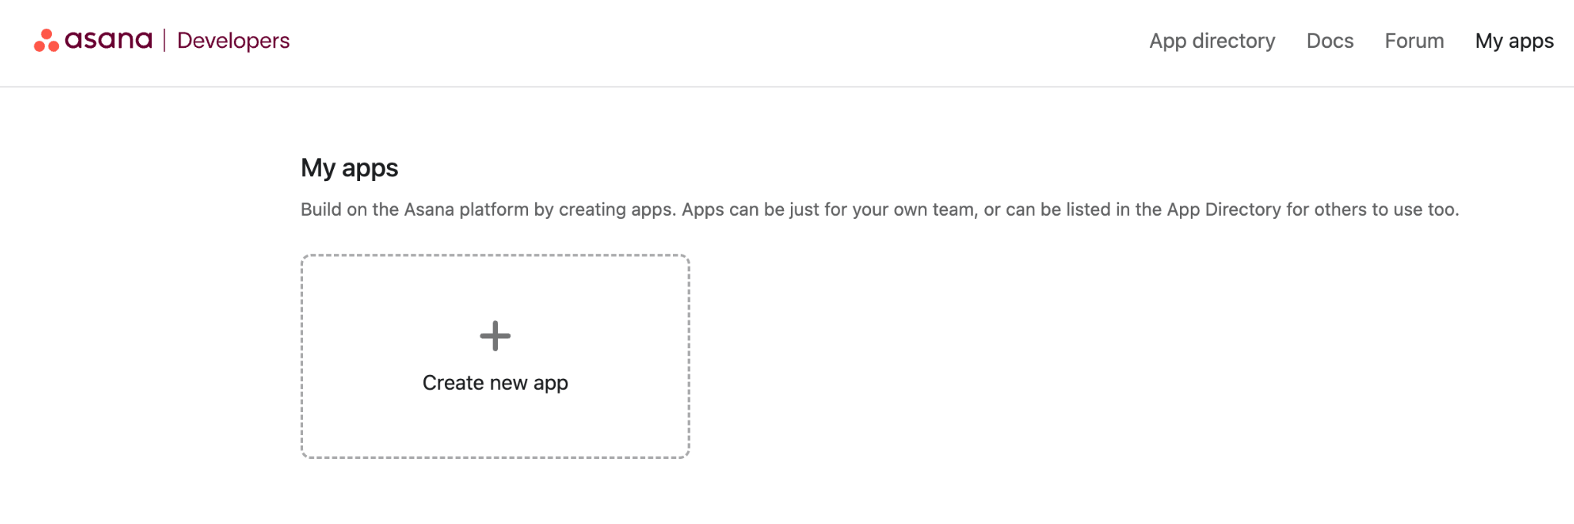
5
Go to Personal access tokens
You’ll land on My apps. In the developer console, open the Personal access tokens section.
Don’t click Create new app — that’s for building an OAuth integration and isn’t what you need here. A personal access token is the quick path for connecting your own account.
6
Create a new token
Click Create new token, give it a recognisable name such as UnleashX, and accept the API terms if prompted.
7
Copy the token immediately
Asana shows the token once, right after creating it. Copy it straight away into a password manager or directly into the UnleashX connector.If you close the dialog before copying, the token can’t be revealed again — delete it and create a replacement.
8
Paste it into UnleashX
Head to Data Connectors → Asana in UnleashX and paste the token (full walkthrough in Section 4). UnleashX validates it on save, so a bad paste shows up right away.
Good to know
Lost your token? It can’t be viewed again after creation. Delete the old one in the developer console, create a fresh token, and reconnect the connector in UnleashX with the new value.
Permissions this token grants UnleashX
4. Connect on UnleashX
1
Open your agent
Go to https://www.tryunleashx.com and open the agent you want to connect.
2
Open Data Connectors
Inside the agent, go to Data Connectors.
3
Find Asana
Locate Asana and click Connect (or Add / Configure).
4
Paste your token
Paste your personal access token and click Connect.
5
Confirm success
UnleashX validates the token and the Asana connector shows a Connected badge.
Use Asana in a Workflow
Once connected, you can add Asana to any automation from the Workflows builder. Its triggers and tools appear in the Apps panel, marked with an MCP badge.1
Add a trigger node
Open Workflows → New Workflow. On the canvas, click + Add Trigger. In the Paths panel, open the Apps tab and select Asana — its Triggers are listed underneath. Use the search box if you have many connectors.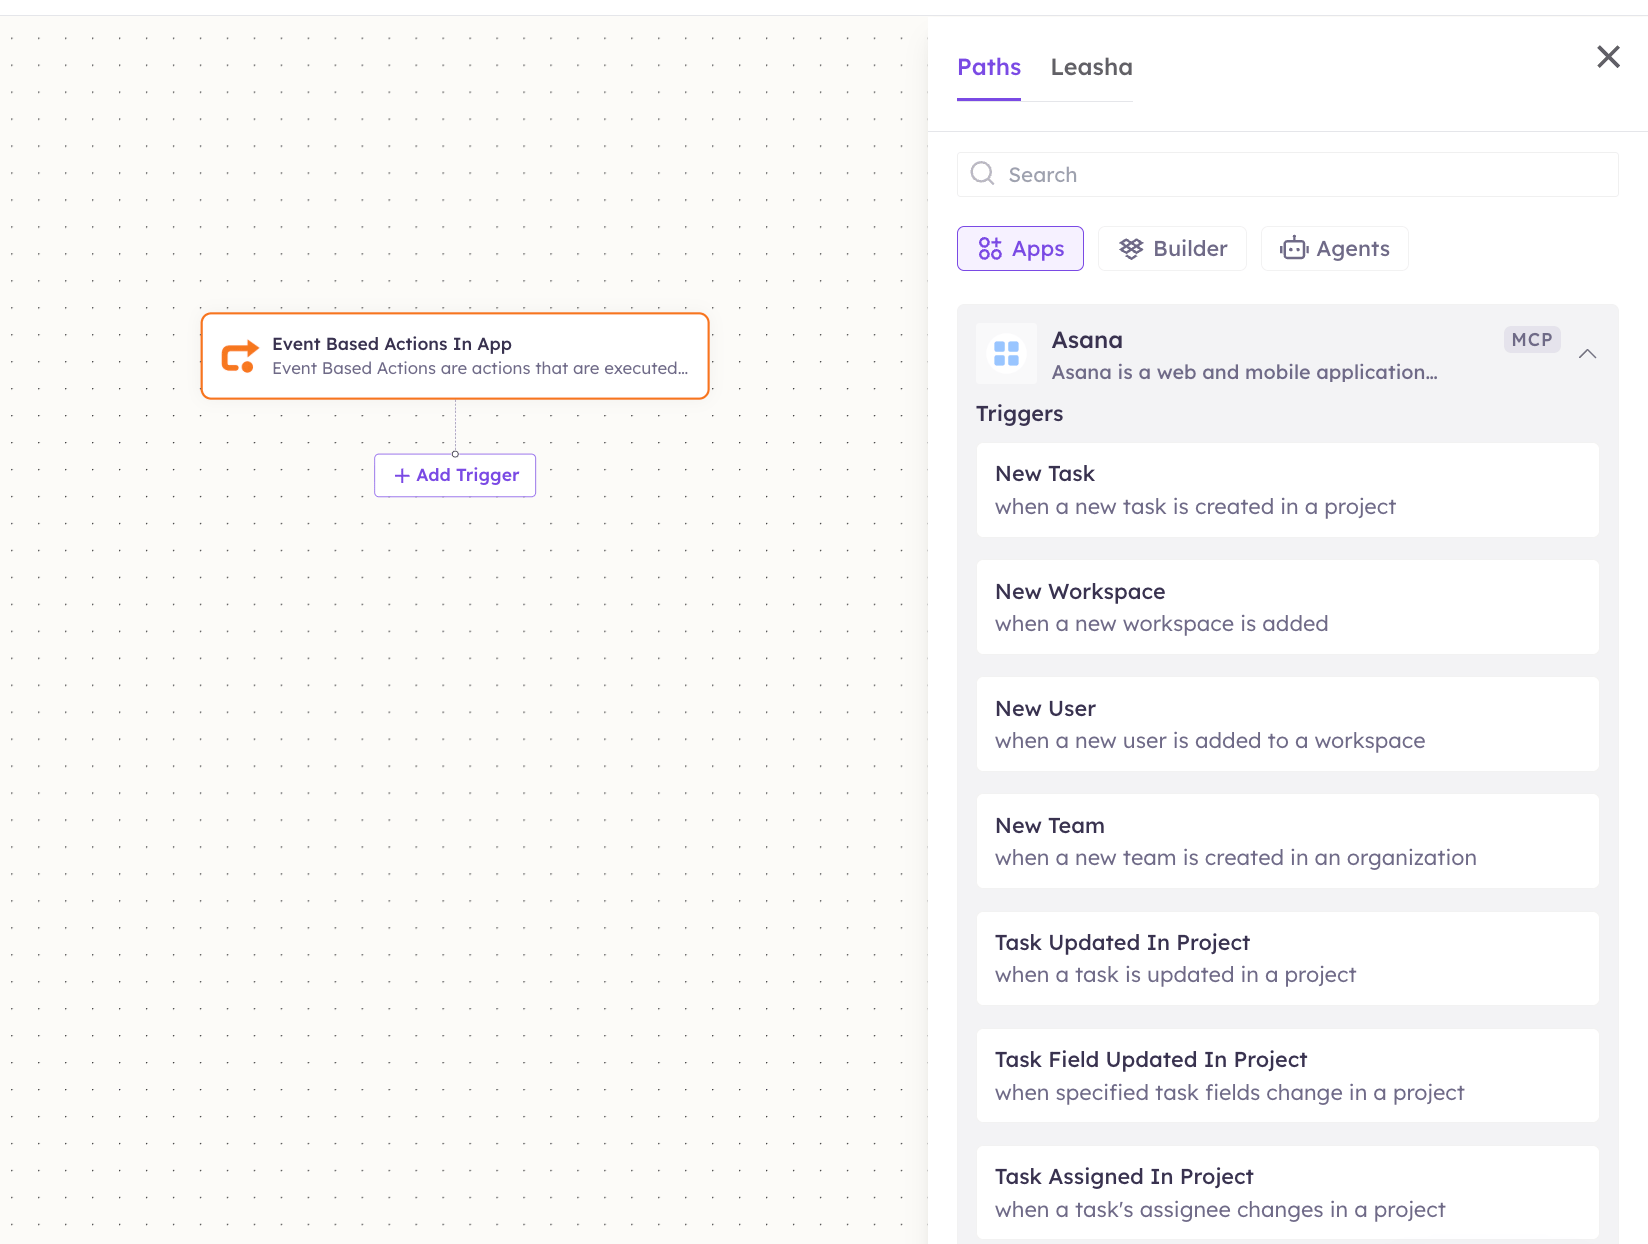
2
Add an action node
Click the + below any node to add a step, then pick Asana again — this time the panel lists its Actions.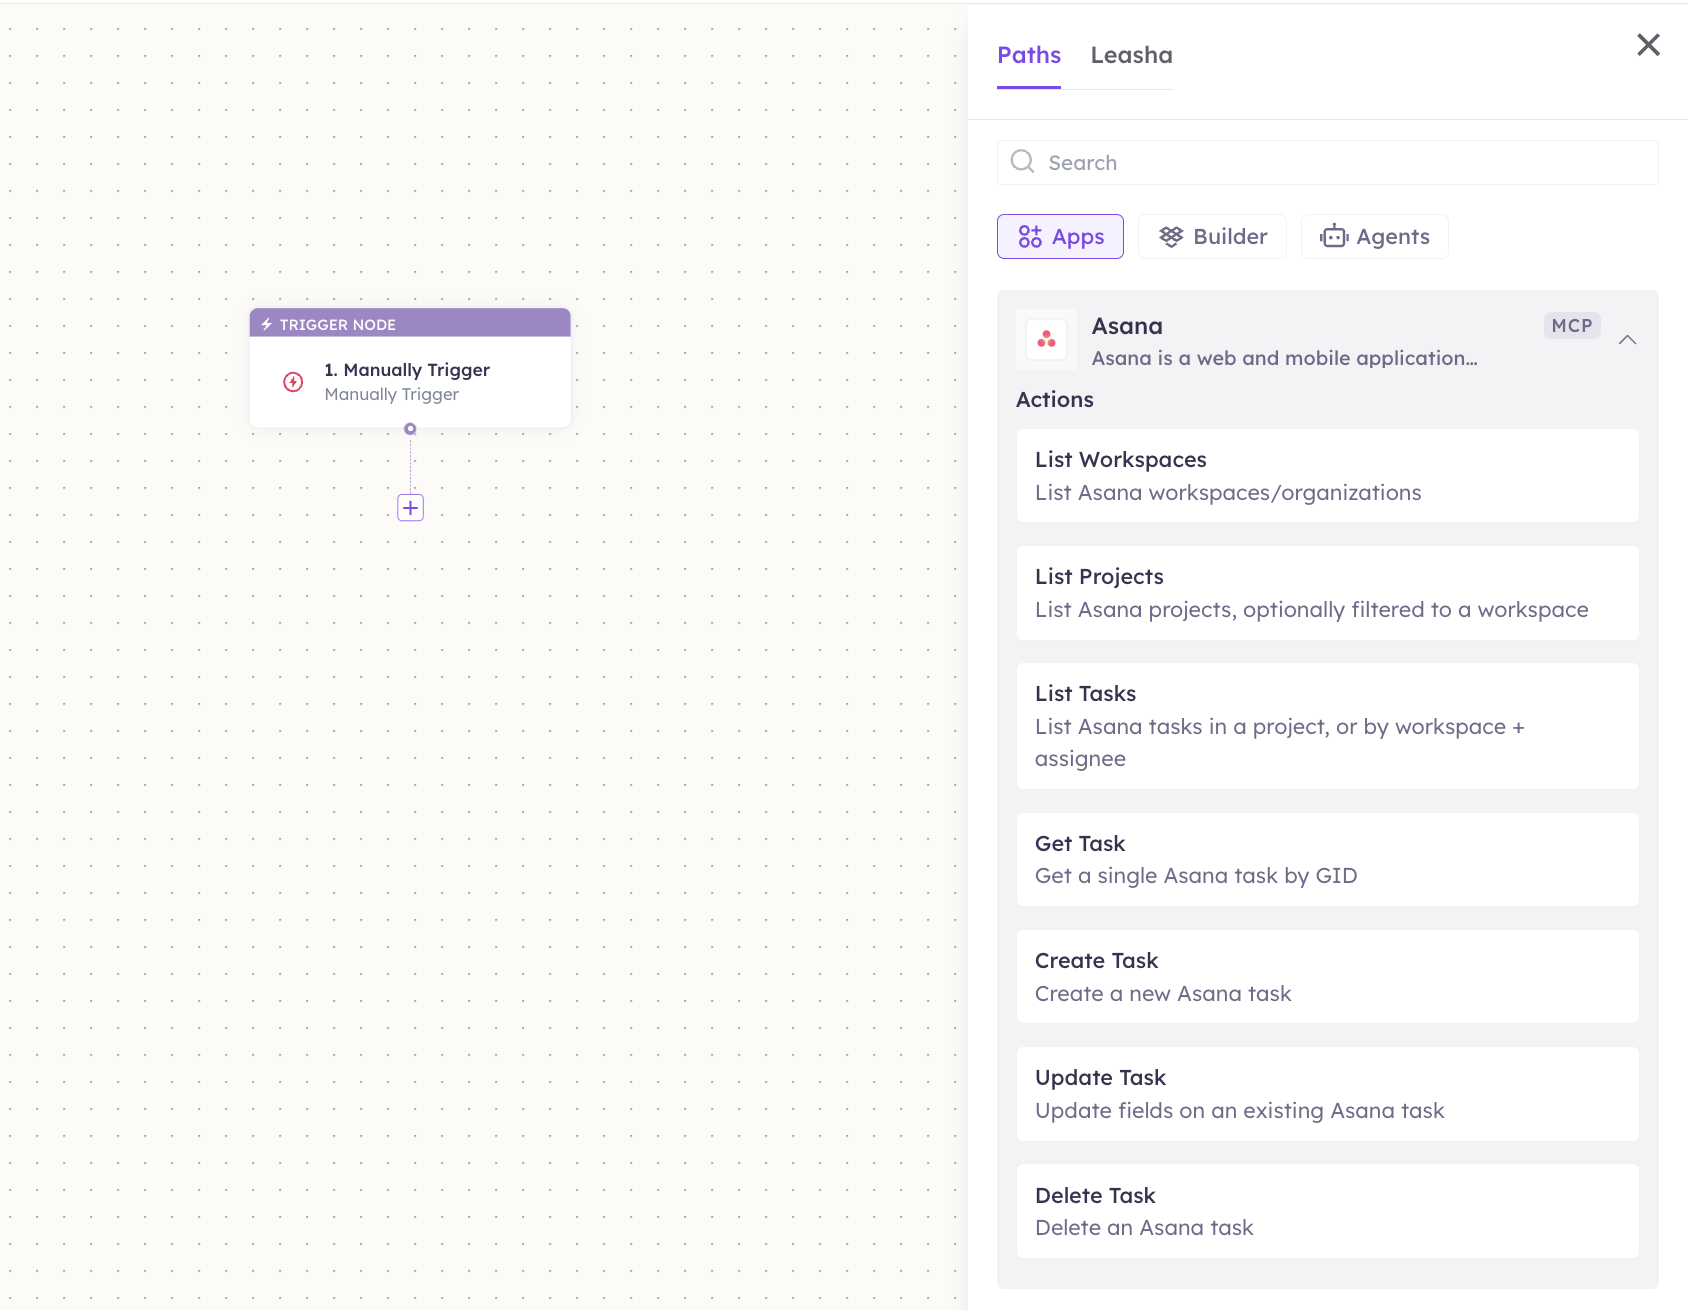
3
Configure the step
Fill in the fields for the trigger or action you picked. Required fields are marked with a red asterisk (*).
4
Add or select your account
Under Selected account, choose an already-connected account, or click Add Account to connect one now.
5
Save and test
Click Save. Use Test to verify the step, then toggle Publish when the workflow is ready.
The steps are the same for every connector. For the full workflow builder guide, see Using MCP in Workflows.
5. Available tools
6. Example usage
“Create a task ‘Draft Q3 report’, assign it to me, and set it due next Friday in the Marketing project.” → Runs Create Task in the Marketing project with the assignee and due date set. “What’s still open in the Website Launch project? Add a comment on the blocked task asking for an update.” → Runs List Tasks on the project, then Add Comment on the blocked task.7. Permissions & data access
UnleashX can:- List and read tasks, projects, sections, comments, and users.
- Create and update tasks, complete and move them, and add subtasks.
- Create projects and add comments.
- Delete tasks where your permissions allow (marked ⚠️).
- Access workspaces, projects, or tasks your account can’t see.
- Change Asana admin, billing, or organization settings.
8. Troubleshooting
For general MCP issues, see /mcp/integrations.
9. Frequently asked questions
Is my Asana data stored by UnleashX? No. UnleashX reads and writes live through the Asana API per request; it doesn’t keep a copy. Can the agent delete tasks? Yes — tools marked ⚠️ make permanent changes and only work if your permissions allow it. Use them deliberately. Can multiple team members connect Asana? Yes. Each person uses their own personal access token, so the agent acts with that user’s access.10. References
- Asana API documentation: https://developers.asana.com/docs
- Personal access tokens: https://developers.asana.com/docs/personal-access-token
- Rate limits: https://developers.asana.com/docs/rate-limits