

Airtable
In one line: Connect Airtable so UnleashX can read and search records, add and update rows, create tables, and detect new records — turning your bases into a live data source for your agent.
1. Overview
Airtable is a flexible database that looks like a spreadsheet. Teams use it as a lightweight CRM, content calendar, inventory tracker, project board and much more — organized into bases, tables, records and fields. Once connected to UnleashX, your agent can add a new record after a call, update a status, search for a row by any value, list what’s in a table, or watch a table and react when a new record appears. Connecting Airtable to UnleashX means your operational data stays current automatically, and your agent can both read context from a base and write results back into it.2. What you’ll need
- An Airtable account.
- The base(s) and table(s) you want UnleashX to access.
- Permission to create a Personal Access Token with access to those bases.
No access to a base? Ask the base owner to share it with you (or with the account that creates the token). The token only reaches bases it’s explicitly granted.
3. Get your credentials
UnleashX authenticates to Airtable with a Personal Access Token (PAT).1
Open Personal access tokens
Go to Airtable → Builder hub → Personal access tokens:
https://airtable.com/create/tokens2
Create a token
Click Create token and give it a name like “UnleashX”.
3
Add scopes
Add the scopes from the table below.
4
Grant base access
Under Access, add the specific base(s) (or workspace) the token may reach.
5
Create and copy
Click Create token and copy it.
4. Connect on UnleashX
1
Open your agent
Sign in at https://www.tryunleashx.com and open the agent you want to connect.
2
Find Airtable
Go to Data Connectors and find Airtable.
3
Connect
Click Connect / Add / Configure and paste your Personal Access Token.
4
Confirm
Save. The status will switch to a Connected badge.
Use Airtable in a Workflow
Once connected, you can add Airtable to any automation from the Workflows builder. Its triggers and tools appear in the Apps panel, marked with an MCP badge.1
Add a trigger node
Open Workflows → New Workflow. On the canvas, click + Add Trigger. In the Paths panel, open the Apps tab and select Airtable — its Triggers are listed underneath. Use the search box if you have many connectors.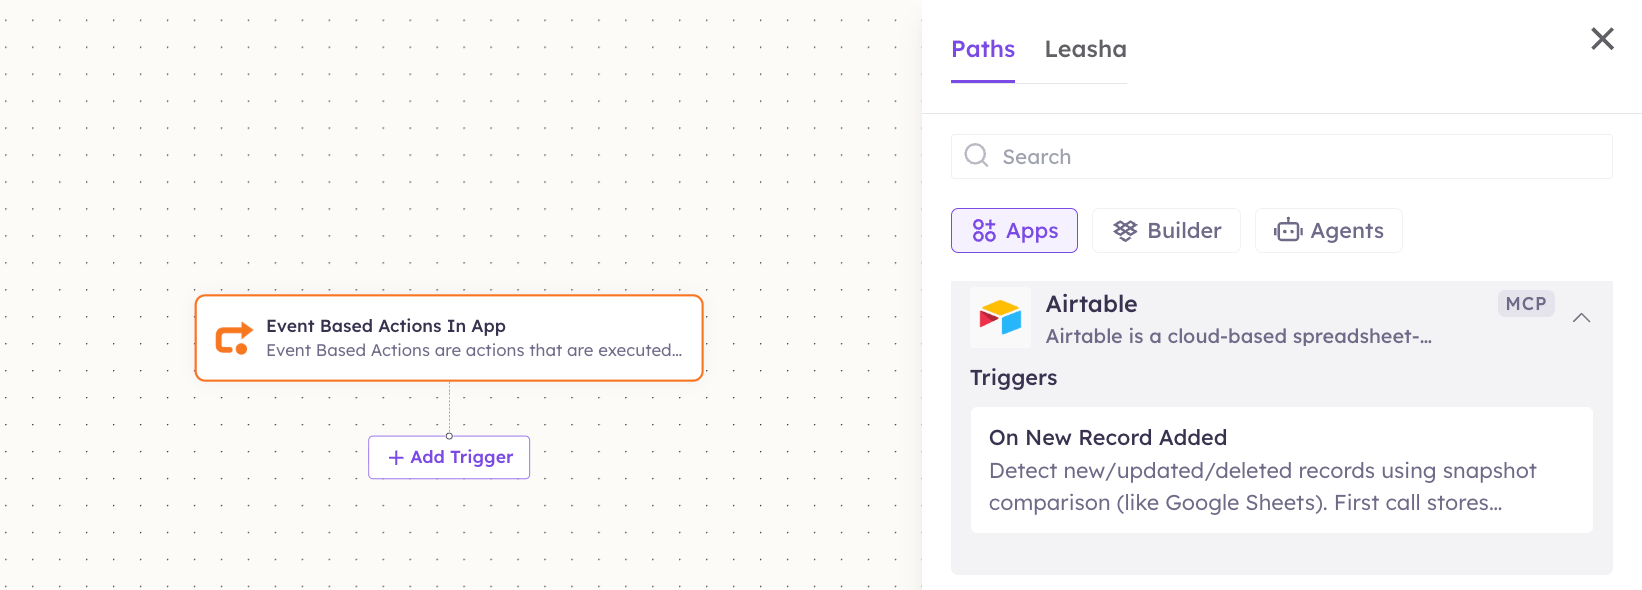
2
Add an action node
Click the + below any node to add a step, then pick Airtable again — this time the panel lists its Actions.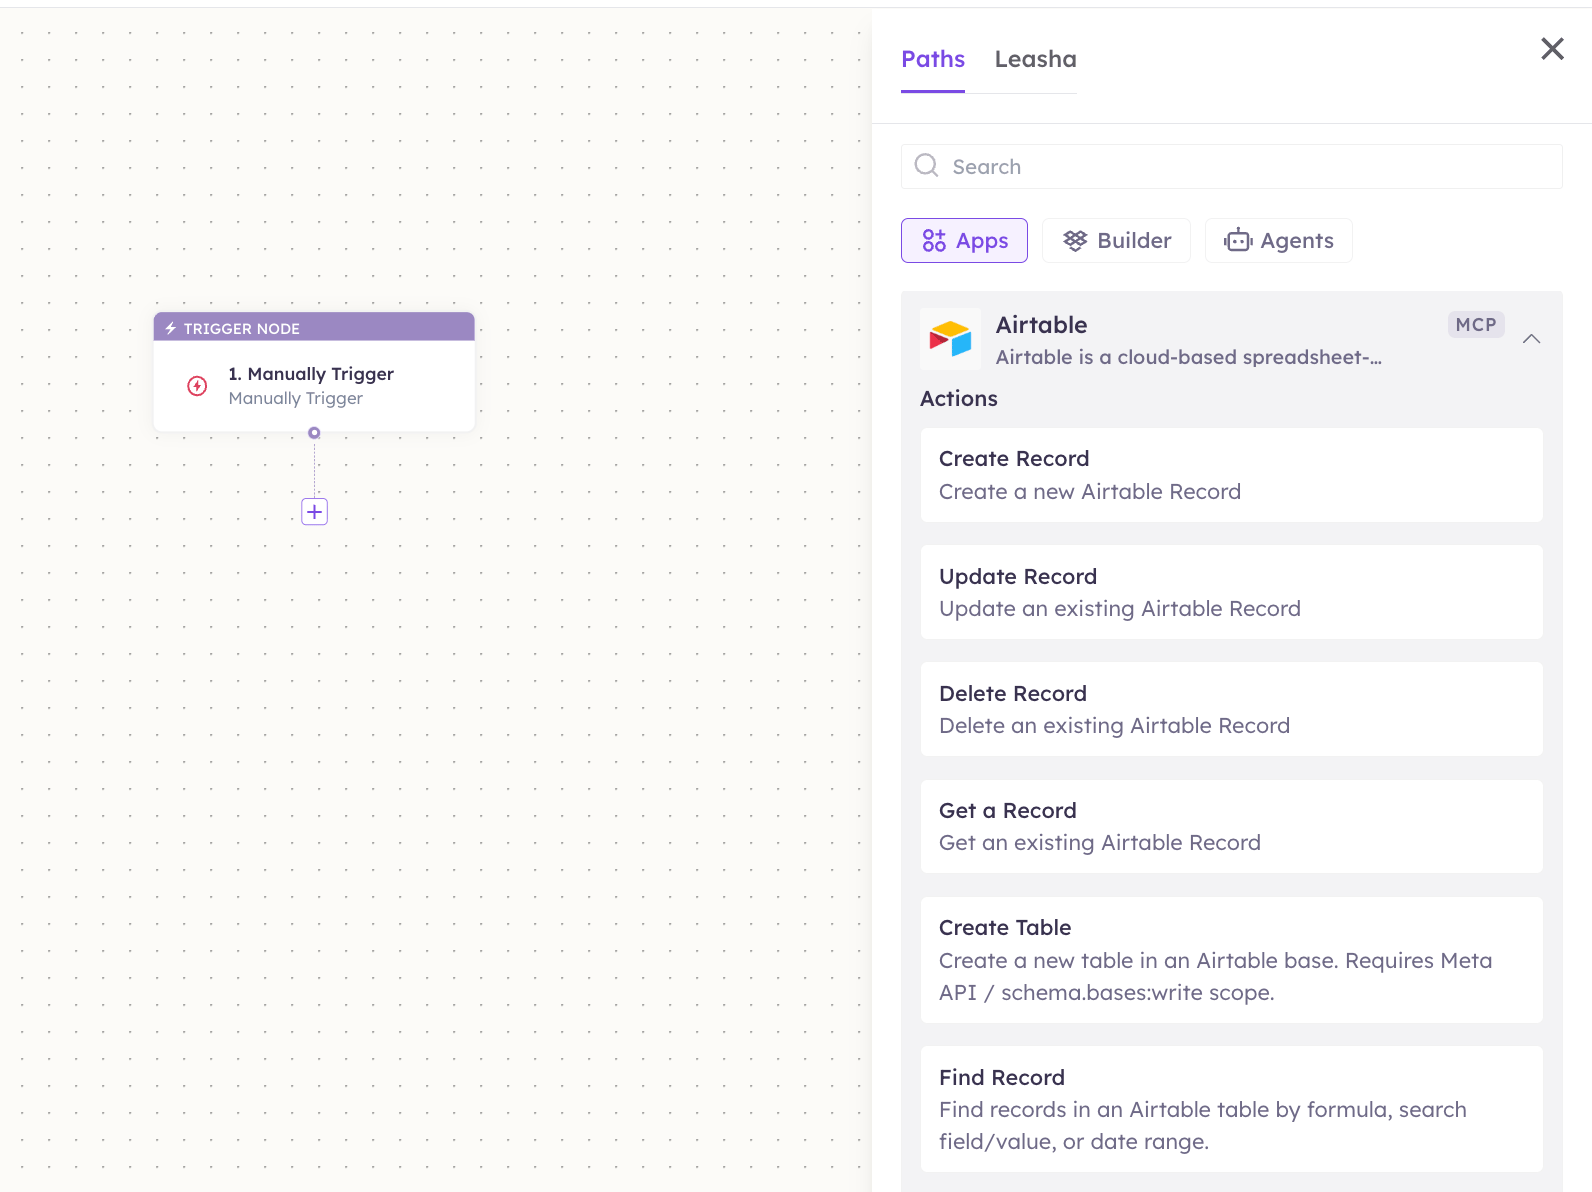
3
Configure the step
Fill in the fields for the trigger or action you picked. Required fields are marked with a red asterisk (*).
4
Add or select your account
Under Selected account, choose an already-connected account, or click Add Account to connect one now.
5
Save and test
Click Save. Use Test to verify the step, then toggle Publish when the workflow is ready.
The steps are the same for every connector. For the full workflow builder guide, see Using MCP in Workflows.
5. Available tools
6. Example usage
“Add a row to my ‘Leads’ table with name Jane Doe, email jane@acme.com, status New.” Runs List Bases / List Tables to resolve the table, then Create Record. “Find the lead with email jane@acme.com and mark their status as Contacted.” Runs Search Records to find the record, then Update Record.7. Permissions & data access
UnleashX can:- Read, search, create, update and delete records in bases the token can reach.
- List bases, tables and fields, and create new tables.
- Watch a table for new records and reset that watch.
- Access any base the token wasn’t explicitly granted.
- Change Airtable account settings, billing or sharing.
- Delete entire bases.
8. Troubleshooting
For general connector issues, see /mcp/integrations.
9. Frequently asked questions
Is my Airtable data stored by UnleashX? No. Tools call the Airtable API live and return the result. Small snapshots of record IDs are kept only to power the “new record” trigger, and you can clear them with Clear Snapshots. Can multiple team members connect Airtable? Yes. Each agent stores its own token. Grant each token only the bases it needs. How do I rotate my token? Create a new Personal Access Token, reconnect in UnleashX, then delete the old token.10. References
- Airtable Web API introduction: https://airtable.com/developers/web/api/introduction
- Personal access tokens page: https://airtable.com/create/tokens
- Scopes & permissions reference: https://airtable.com/developers/web/api/scopes