

Jira
In one line: Connect Jira so your UnleashX agent can create and update issues, move them through workflows, assign work, and pull sprint and standup reports automatically.
1. Overview
Jira is Atlassian’s issue and project tracking tool. Teams use it to plan work in projects and boards, organize it into sprints and backlogs, and move issues through a workflow from “To Do” to “Done.” Once connected, your UnleashX agent can create and update issues, comment, transition issues across statuses, assign work to teammates, and generate reports such as active-sprint status, team workload, and a daily standup summary — all from natural language. Connecting Jira to UnleashX is useful when you want to capture bugs and tasks as they come up, keep boards current, and get instant status updates without digging through Jira screens.2. What you’ll need
- An Atlassian / Jira Cloud account with access to the projects you want to use.
- Your Atlassian account email (used together with the API token).
- A Jira Cloud site URL (e.g.
https://your-company.atlassian.net). - Permission to view, create, and transition issues in the relevant projects.
You don’t need to be a Jira admin to create an API token — any user can. But your token only has the permissions your account has, so you can only see and edit projects you already have access to.
3. Get your credentials
Jira Cloud uses Basic auth: your account email plus an Atlassian API token.1
Open the API tokens page
Go to https://id.atlassian.com/manage-profile/security/api-tokens while signed in to Atlassian.
2
Create a token
Click Create API token, give it a label like
UnleashX, and click Create.3
Copy the token
Copy the generated token.
4
Note your email and site URL
Have your Atlassian login email and your Jira site URL (
https://your-company.atlassian.net) ready — UnleashX needs all three.An Atlassian API token grants the same access your account has — Jira does not let you scope a personal token to specific projects. UnleashX only calls the endpoints needed for the tools in Section 5.
4. Connect on UnleashX
1
Open your agent
Go to https://www.tryunleashx.com and open the agent you want to connect.
2
Open Data Connectors
In the agent, go to Data Connectors.
3
Find Jira
Locate Jira in the list and click Connect / Add / Configure.
4
Enter your details
Provide your Jira site URL, your Atlassian email, and your API token. UnleashX combines the email and token as HTTP Basic auth.
5
Confirm success
Save. When the status shows a Connected badge, your agent can start working with Jira.
Use Jira in a Workflow
Once connected, you can add Jira to any automation from the Workflows builder. Its triggers and tools appear in the Apps panel, marked with an MCP badge.1
Add a trigger node
Open Workflows → New Workflow. On the canvas, click + Add Trigger. In the Paths panel, open the Apps tab and select Jira — its Triggers are listed underneath. Use the search box if you have many connectors.
2
Add an action node
Click the + below any node to add a step, then pick Jira again — this time the panel lists its Actions.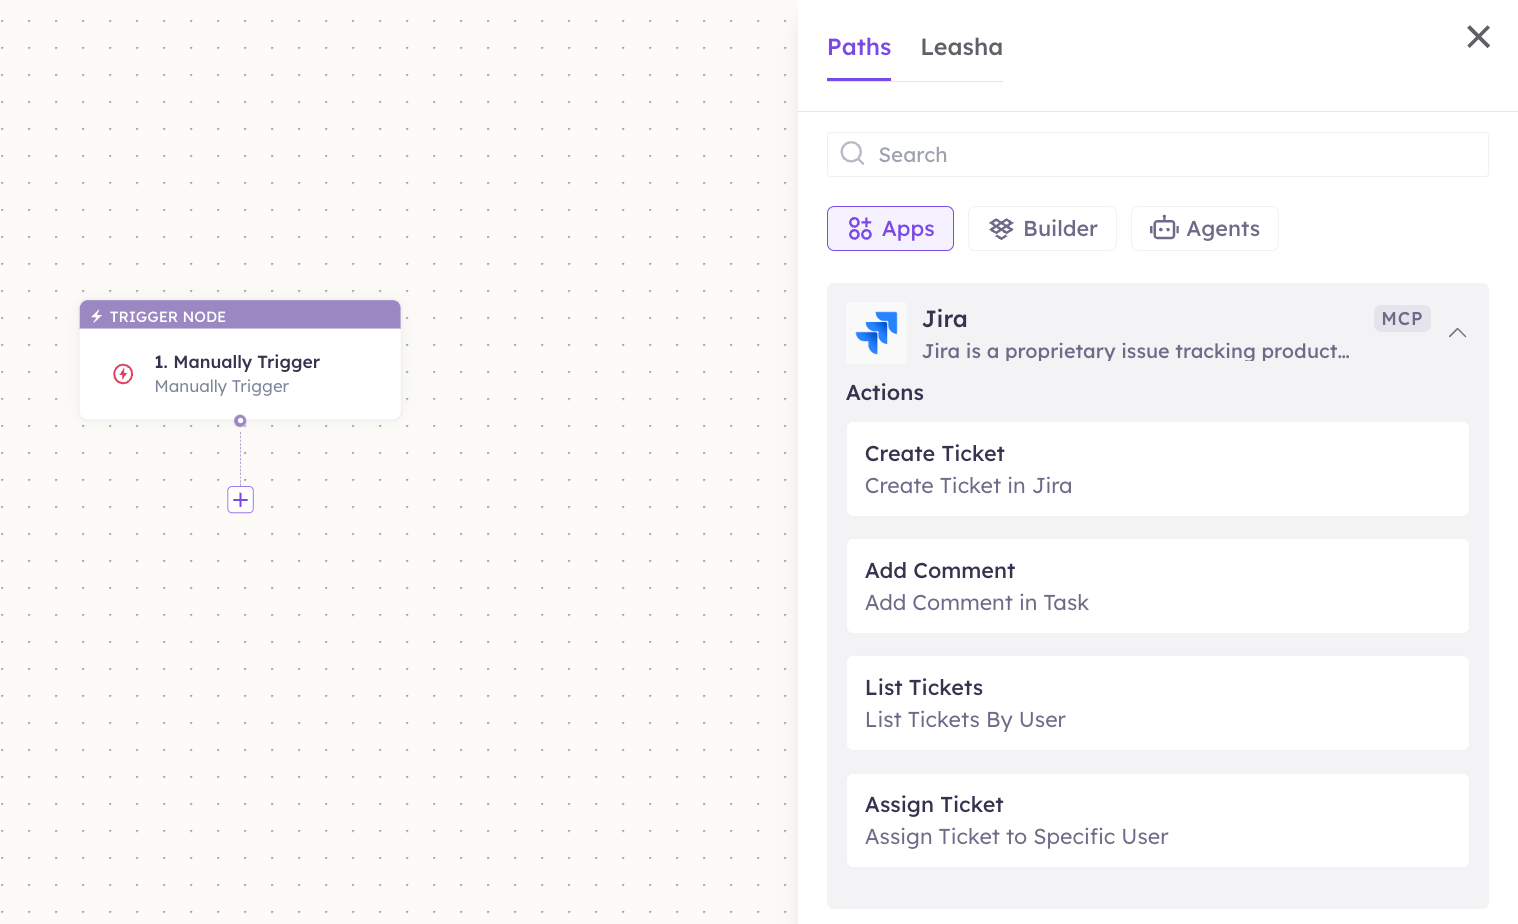
3
Configure the step
Fill in the fields for the trigger or action you picked. Required fields are marked with a red asterisk (*).
4
Add or select your account
Under Selected account, choose an already-connected account, or click Add Account to connect one now.
5
Save and test
Click Save. Use Test to verify the step, then toggle Publish when the workflow is ready.
The steps are the same for every connector. For the full workflow builder guide, see Using MCP in Workflows.
5. Available tools
6. Example usage
“Create a bug in the WEB project titled ‘Login button broken on mobile’ and assign it to Priya.” Behind the scenes: Search Users (to find Priya) → Create Issue → Assign Issue. “Give me today’s standup for the Sprint board and move JIRA-204 to In Progress.” Behind the scenes: Get Active Sprint → Generate Standup Report → List Transitions → Transition Issue.7. Permissions & data access
UnleashX CAN:- Read projects, boards, sprints, backlogs, and issues you can access.
- Create and update issues, add comments, and transition issues.
- Assign issues and look up users.
- Generate sprint status, team workload, and standup reports.
- Access projects your Jira account can’t see.
- Change Jira admin, workflow, or billing configuration.
- Act beyond the permissions your Atlassian account has.
8. Troubleshooting
For general connection issues, see /mcp/integrations.
9. Frequently asked questions
Is my data stored by UnleashX? UnleashX calls Jira live using your token when a tool runs. It doesn’t keep a separate copy of your issues beyond what’s needed to complete a request. Can multiple team members connect? Yes. Each person creates their own Atlassian API token and connects with their own email. Each connection reflects that person’s Jira permissions. How do I rotate my key? Create a new token at the Atlassian API tokens page, update it in UnleashX, then delete the old token. Access switches over immediately. Why Basic auth and not OAuth? Jira Cloud’s API token model uses HTTP Basic auth with your email + token. UnleashX follows Atlassian’s documented approach.10. References
- Jira Cloud REST API: https://developer.atlassian.com/cloud/jira/platform/rest/v3/
- Create API token: https://id.atlassian.com/manage-profile/security/api-tokens
- Basic auth reference: https://developer.atlassian.com/cloud/jira/platform/basic-auth-for-rest-apis/