> ## Documentation Index
> Fetch the complete documentation index at: https://docs.unleashx.ai/llms.txt
> Use this file to discover all available pages before exploring further.
# Outlook
> Let your UnleashX agent read, send, organize, and triage your Outlook email and contacts.
# Outlook
> **In one line:** Connect your Microsoft Outlook mailbox so your UnleashX agent can send and reply to email, draft messages, organize your inbox, and manage contacts — on your behalf.
| | |
| ------------------ | ---------------------------------------------------------------------------------------------------- |
| **Category** | Communication |
| **Authentication** | OAuth (Microsoft 365 / Microsoft Graph) |
| **Setup time** | \~2 minutes |
| **Difficulty** | Easy |
| **Best for** | Teams that live in Outlook and want an AI agent to handle email triage, replies, and contact lookups |
## 1. Overview
Outlook is Microsoft's email and contacts service, part of Microsoft 365. It holds your mailbox, folders, categories, and your personal address book — and it's where a huge amount of day-to-day work happens.
Once connected to UnleashX, your agent can do the things you'd normally do by hand: find a specific email, send a new message, reply in a thread, save a draft for you to review, move messages into folders, mark them as read, and look up or update contacts. You stay in control — the agent acts on your real mailbox using your own Microsoft sign-in.
Connecting Outlook to UnleashX turns email from a chore into a conversation. Instead of digging through your inbox, you can ask your agent to "reply to the last email from Priya confirming Tuesday" or "draft a follow-up to everyone who didn't respond," and it handles the Outlook side for you.
## 2. What you'll need
* A Microsoft account with an Outlook mailbox (personal `@outlook.com`/`@hotmail.com`, or a Microsoft 365 / Exchange Online work or school account).
* Permission to use that mailbox — for work accounts, your organization must allow third-party apps to connect via Microsoft Graph.
* An UnleashX account with access to **Data Connectors**.
You do **not** need to create or paste an API key. Outlook uses OAuth — you simply click **Authorize** and sign in with Microsoft.
If you use a **work or school** Microsoft 365 account, your IT administrator may need to approve UnleashX (admin consent) before the connection succeeds. If sign-in shows a "need admin approval" screen, contact your Microsoft 365 admin.
## 3. Get your credentials
There's nothing to copy and paste. Outlook authentication is handled entirely through Microsoft's secure OAuth sign-in.
When you connect Outlook (see Section 4), UnleashX opens a Microsoft **Authorize** window.
Enter your Outlook / Microsoft 365 email and password at `https://login.microsoftonline.com` (Microsoft's official sign-in). Complete multi-factor authentication if prompted.
Microsoft shows exactly what UnleashX is asking for (see the scopes table below). Click **Accept** to grant access.
Microsoft redirects you back automatically and the connector is now linked to your mailbox.
**Permissions (Microsoft Graph scopes) UnleashX requests:**
| Scope | Why UnleashX needs it |
| ---------------------- | ---------------------------------------------------------------------------------------------- |
| `Mail.ReadWrite` | Read your emails, and create/update drafts, mark messages read, and move them between folders. |
| `Mail.Send` | Send new emails and replies on your behalf. |
| `MailboxSettings.Read` | Read mailbox settings such as folders and categories (labels). |
| `Contacts.ReadWrite` | List, find, create, and update contacts in your address book. |
| `User.Read` | Identify the signed-in account (your name and email) so messages are sent from you. |
| `offline_access` | Keep the connection alive by refreshing access without making you sign in again each time. |
These are standard Microsoft Graph delegated scopes. Microsoft, not UnleashX, enforces them — UnleashX can never do more than the scopes you approve.
## 4. Connect on UnleashX
Go to `https://www.tryunleashx.com` and open the agent you want to give Outlook access to.
In the agent, go to **Data Connectors**.
Locate **Outlook** in the list and click **Connect** (or **Add** / **Configure**).
Click **Authorize**. Sign in with your Microsoft account and accept the permissions.
You're returned to UnleashX and the Outlook connector shows a **Connected** badge.
### Use Outlook in a Workflow
Once connected, you can add **Outlook** to any automation from the **Workflows** builder. Its triggers and tools appear in the Apps panel, marked with an **MCP** badge.
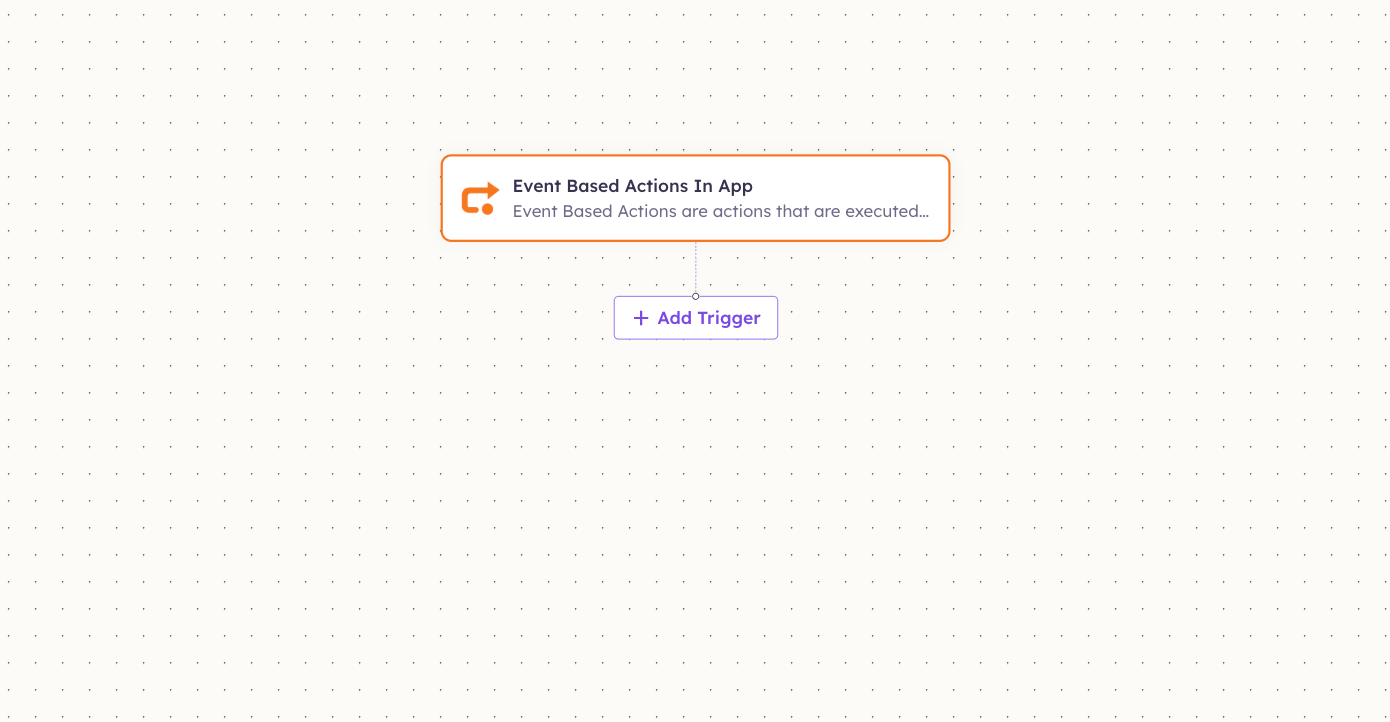
Open **Workflows → New Workflow**. On the canvas, click **+ Add Trigger** (or the **+** below any node) to add a step.
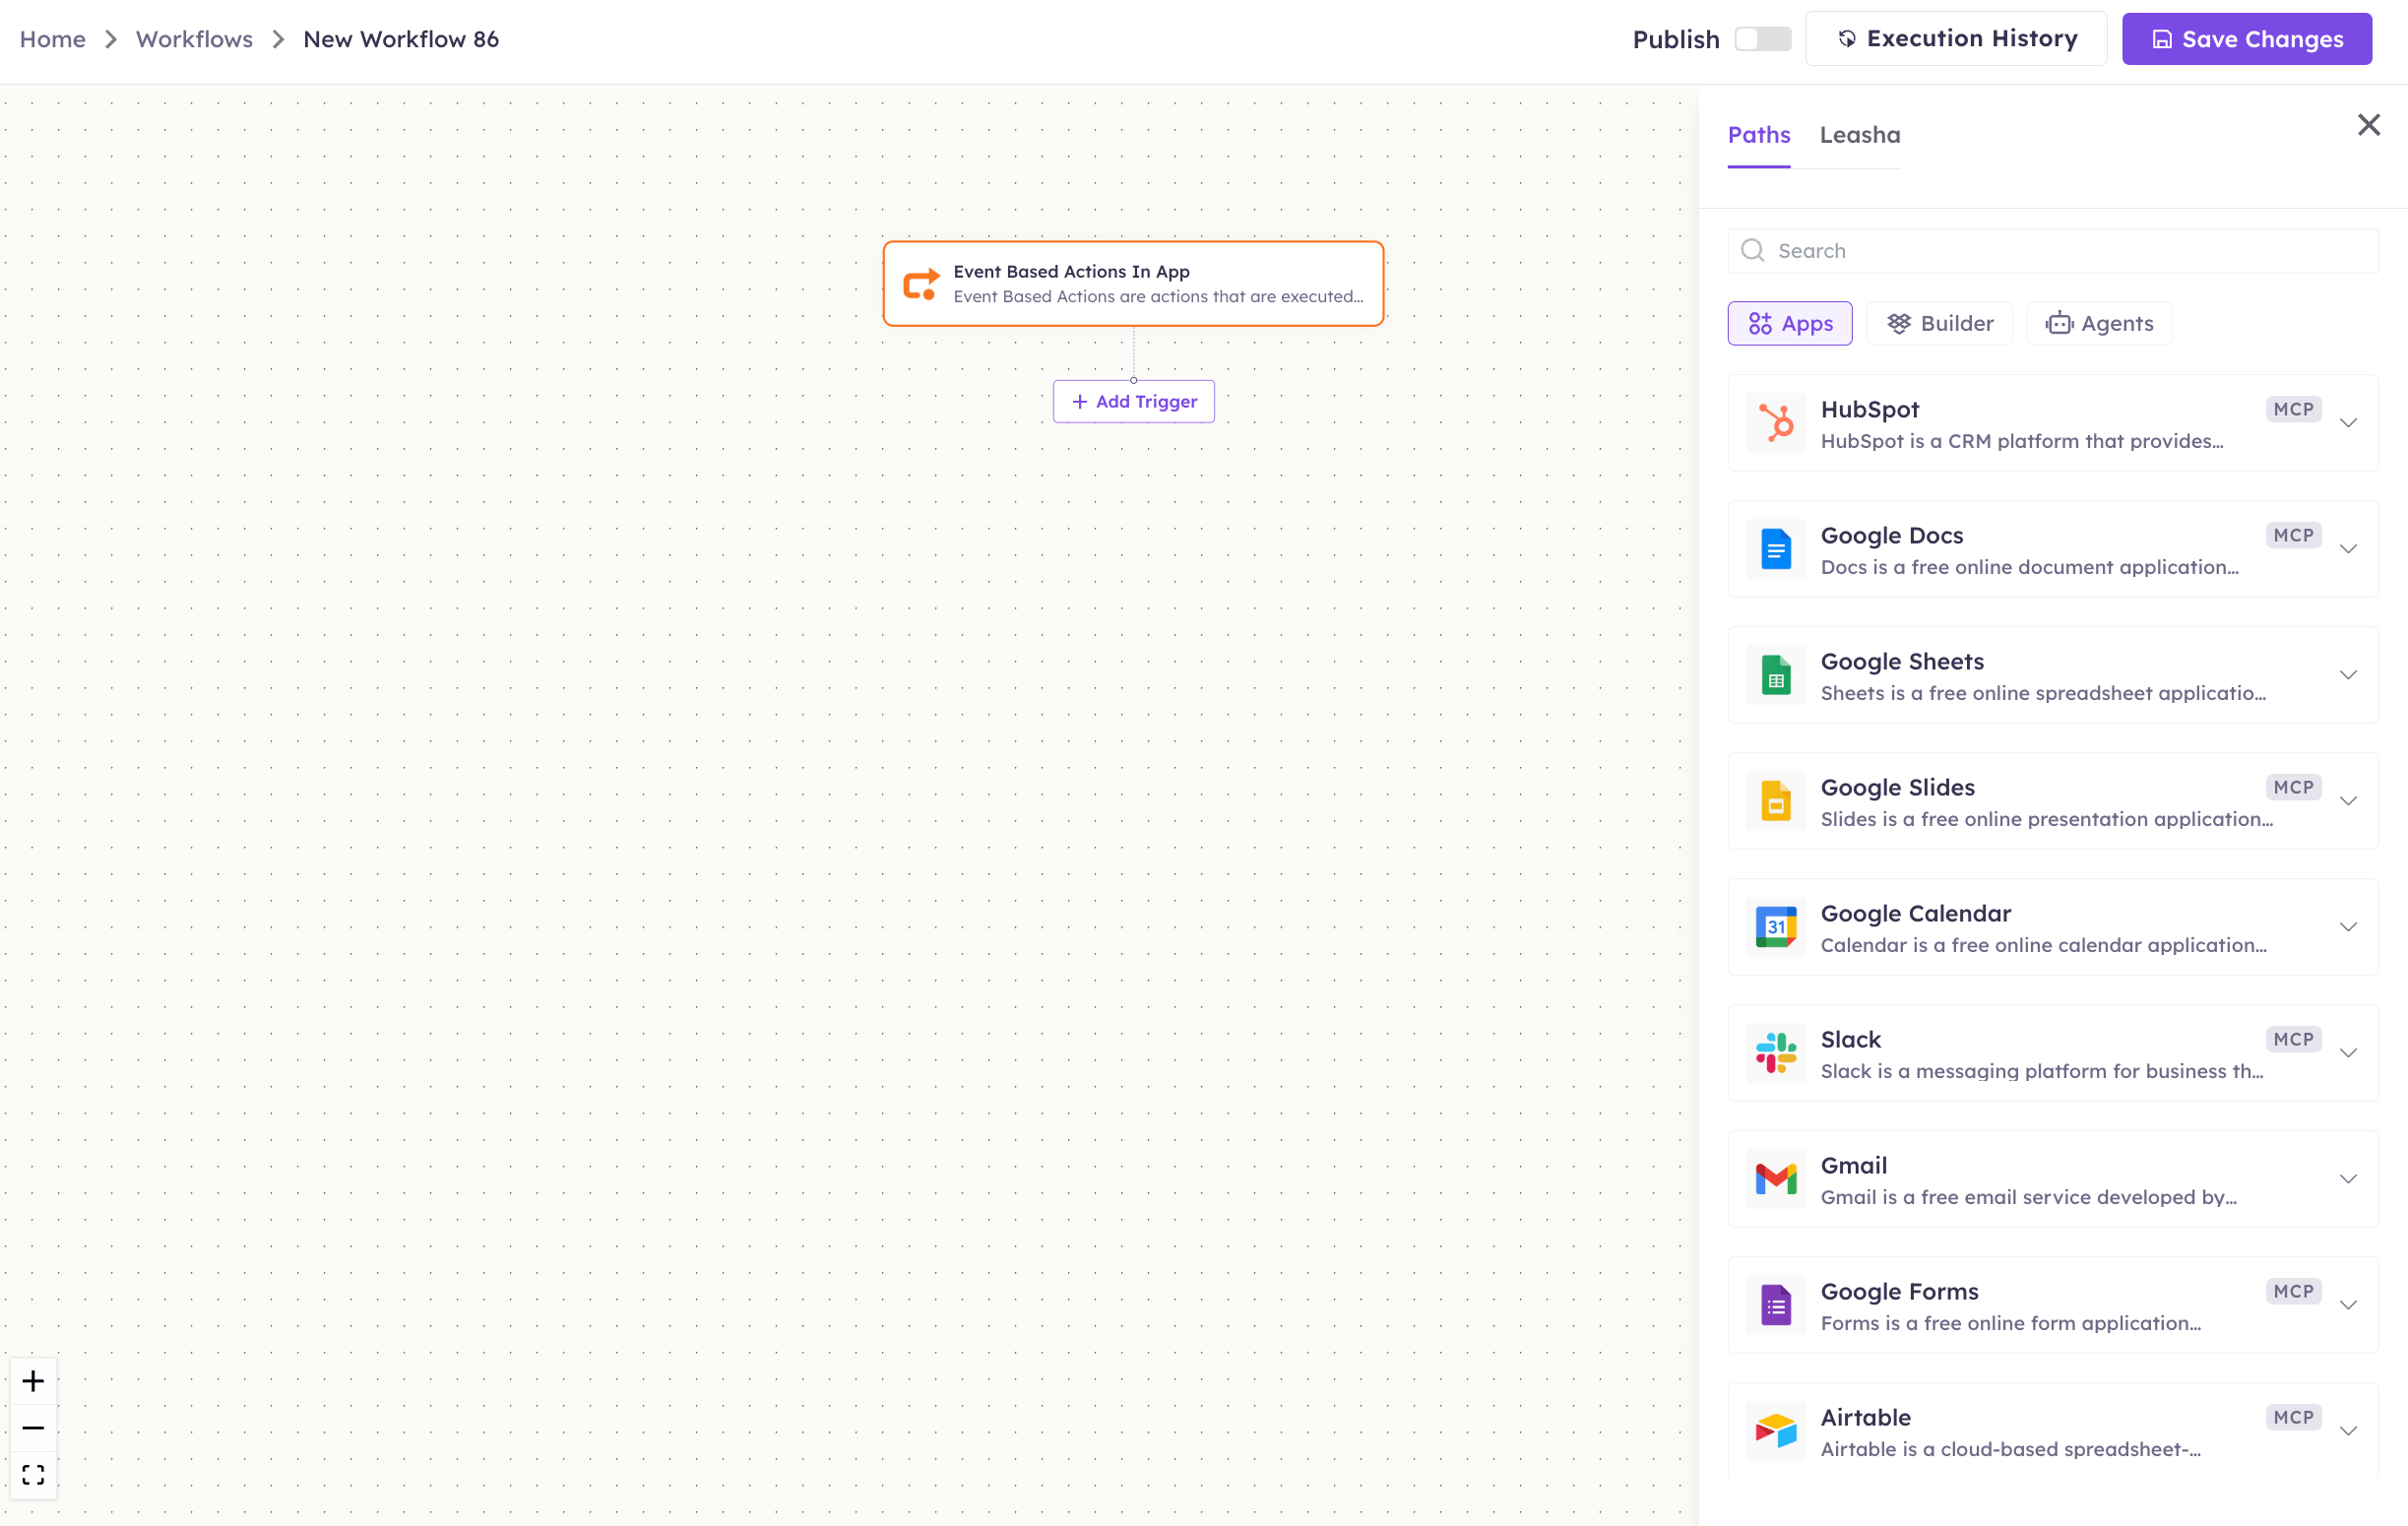
 In the **Paths** panel, open the **Apps** tab and select **Outlook**. Use the search box if you have many connectors.
 Pick the trigger or action you want. Configure its fields — required fields are marked with a red asterisk (\*).
Under **Selected account**, choose an already-connected account, or click **Add Account** to connect one now.
Fill in the remaining fields and click **Save**. Use **Test** to verify the step, then toggle **Publish** when the workflow is ready.
The steps are the same for every connector. For the full workflow builder guide, see [Using MCP in Workflows](/mcp/workflows).
## 5. Available tools
| Tool | What it does | Changes data? |
| ----------------------- | ----------------------------------------------------------------------------------------- | ------------- |
| Send Email | Sends a new email to one or more recipients. | ✏️ Yes |
| Send Reply | Replies to an existing email thread. | ✏️ Yes |
| Draft Email | Creates a draft email saved in your Drafts folder. | ✏️ Yes |
| Create Draft Email | Creates a draft email (with full recipient/subject/body fields) for later review or send. | ✏️ Yes |
| Find Email | Searches your mailbox for a specific email. | No |
| Move Message | Moves a message to another folder. | ✏️ Yes |
| Move Email to Folder | Moves an email into a named folder (e.g. Archive). | ✏️ Yes |
| Mark Email Read | Marks an email as read (or unread). | ✏️ Yes |
| Add Label to Email | Adds an Outlook category (label) to an email. | ✏️ Yes |
| Remove Label from Email | Removes an Outlook category (label) from an email. | ⚠️ Yes |
| List Labels | Lists all your Outlook categories (labels). | No |
| List Folders | Lists your mailbox folders. | No |
| List Emails | Lists emails from your inbox or a chosen folder. | No |
| List Contacts | Lists contacts from your address book. | No |
| Find Contacts | Searches your contacts by name or email. | No |
| Create Contact | Creates a new contact. | ✏️ Yes |
| Update Contact | Updates an existing contact's details. | ✏️ Yes |
## 6. Example usage
**"Reply to the latest email from the finance team and let them know the invoice is approved."**
→ Runs Find Email (or List Emails) to locate the thread, then Send Reply to send your response.
**"Draft a welcome email to our new vendor contact, and add them to my contacts."**
→ Runs Create Contact to save the vendor, then Create Draft Email so you can review the message before it goes out.
## 7. Permissions & data access
**UnleashX can:**
* Read, search, and list emails in your mailbox and folders.
* Send new emails and replies as you.
* Create drafts, move messages, mark them read/unread, and add or remove categories (labels).
* List, find, create, and update contacts.
**UnleashX cannot:**
* Permanently delete your emails (it can move and recategorize them, but the tool set doesn't expose a hard-delete).
* Access other Microsoft 365 services (Teams, SharePoint, OneDrive) — only Outlook mail and contacts within the scopes you approved.
* Change your Microsoft password or account security settings.
**To disconnect:** In UnleashX, open **Data Connectors → Outlook → Disconnect**. You can also revoke access anytime at `https://account.microsoft.com/privacy/app-access` (or, for work accounts, via your organization's My Apps portal). Disconnecting revokes access immediately.
## 8. Troubleshooting
| Problem | What it means | How to fix it |
| ------------------------------------ | --------------------------------------------------------------------- | ------------------------------------------------------------------------------------------------------------ |
| **401 Unauthorized** | Your Microsoft sign-in expired or the token is invalid. | Reconnect Outlook in **Data Connectors** and sign in with Microsoft again. |
| **403 Forbidden** | A required Graph permission wasn't granted, or your org blocked it. | Reconnect and accept all permissions; for work accounts ask your Microsoft 365 admin to grant admin consent. |
| **"Need admin approval"** | Your organization requires admin consent for third-party apps. | Send the consent request to your Microsoft 365 administrator to approve UnleashX. |
| **Email not found** | The message moved, was deleted, or your search terms were too narrow. | Ask the agent to list recent emails or broaden the search. |
| **Send failed / recipient rejected** | An invalid recipient address or an org mail policy blocked it. | Verify the recipient address and check your organization's mail rules. |
For general MCP issues, see [/mcp/integrations](/mcp/integrations).
## 9. Frequently asked questions
**Is my email data stored by UnleashX?**
No. UnleashX accesses your mailbox live through Microsoft Graph to perform each request. It doesn't keep a copy of your inbox.
**Can multiple team members connect their own Outlook?**
Yes. Each person authorizes their own Microsoft account, so the agent acts on each user's own mailbox with their own permissions.
**Do I ever need to re-authenticate?**
Usually not — `offline_access` keeps the connection refreshed. If Microsoft revokes the session (password change, MFA reset, or admin policy), just reconnect.
**Can the agent send email as someone else?**
No. It can only send as the account you signed in with.
## 10. References
* Microsoft Graph mail overview: [https://learn.microsoft.com/en-us/graph/api/resources/mail-api-overview](https://learn.microsoft.com/en-us/graph/api/resources/mail-api-overview)
* Microsoft Graph permissions reference: [https://learn.microsoft.com/en-us/graph/permissions-reference](https://learn.microsoft.com/en-us/graph/permissions-reference)
* Manage app access / revoke (personal): [https://account.microsoft.com/privacy/app-access](https://account.microsoft.com/privacy/app-access)
* Microsoft sign-in: [https://login.microsoftonline.com](https://login.microsoftonline.com)
Pick the trigger or action you want. Configure its fields — required fields are marked with a red asterisk (\*).
Under **Selected account**, choose an already-connected account, or click **Add Account** to connect one now.
Fill in the remaining fields and click **Save**. Use **Test** to verify the step, then toggle **Publish** when the workflow is ready.
The steps are the same for every connector. For the full workflow builder guide, see [Using MCP in Workflows](/mcp/workflows).
## 5. Available tools
| Tool | What it does | Changes data? |
| ----------------------- | ----------------------------------------------------------------------------------------- | ------------- |
| Send Email | Sends a new email to one or more recipients. | ✏️ Yes |
| Send Reply | Replies to an existing email thread. | ✏️ Yes |
| Draft Email | Creates a draft email saved in your Drafts folder. | ✏️ Yes |
| Create Draft Email | Creates a draft email (with full recipient/subject/body fields) for later review or send. | ✏️ Yes |
| Find Email | Searches your mailbox for a specific email. | No |
| Move Message | Moves a message to another folder. | ✏️ Yes |
| Move Email to Folder | Moves an email into a named folder (e.g. Archive). | ✏️ Yes |
| Mark Email Read | Marks an email as read (or unread). | ✏️ Yes |
| Add Label to Email | Adds an Outlook category (label) to an email. | ✏️ Yes |
| Remove Label from Email | Removes an Outlook category (label) from an email. | ⚠️ Yes |
| List Labels | Lists all your Outlook categories (labels). | No |
| List Folders | Lists your mailbox folders. | No |
| List Emails | Lists emails from your inbox or a chosen folder. | No |
| List Contacts | Lists contacts from your address book. | No |
| Find Contacts | Searches your contacts by name or email. | No |
| Create Contact | Creates a new contact. | ✏️ Yes |
| Update Contact | Updates an existing contact's details. | ✏️ Yes |
## 6. Example usage
**"Reply to the latest email from the finance team and let them know the invoice is approved."**
→ Runs Find Email (or List Emails) to locate the thread, then Send Reply to send your response.
**"Draft a welcome email to our new vendor contact, and add them to my contacts."**
→ Runs Create Contact to save the vendor, then Create Draft Email so you can review the message before it goes out.
## 7. Permissions & data access
**UnleashX can:**
* Read, search, and list emails in your mailbox and folders.
* Send new emails and replies as you.
* Create drafts, move messages, mark them read/unread, and add or remove categories (labels).
* List, find, create, and update contacts.
**UnleashX cannot:**
* Permanently delete your emails (it can move and recategorize them, but the tool set doesn't expose a hard-delete).
* Access other Microsoft 365 services (Teams, SharePoint, OneDrive) — only Outlook mail and contacts within the scopes you approved.
* Change your Microsoft password or account security settings.
**To disconnect:** In UnleashX, open **Data Connectors → Outlook → Disconnect**. You can also revoke access anytime at `https://account.microsoft.com/privacy/app-access` (or, for work accounts, via your organization's My Apps portal). Disconnecting revokes access immediately.
## 8. Troubleshooting
| Problem | What it means | How to fix it |
| ------------------------------------ | --------------------------------------------------------------------- | ------------------------------------------------------------------------------------------------------------ |
| **401 Unauthorized** | Your Microsoft sign-in expired or the token is invalid. | Reconnect Outlook in **Data Connectors** and sign in with Microsoft again. |
| **403 Forbidden** | A required Graph permission wasn't granted, or your org blocked it. | Reconnect and accept all permissions; for work accounts ask your Microsoft 365 admin to grant admin consent. |
| **"Need admin approval"** | Your organization requires admin consent for third-party apps. | Send the consent request to your Microsoft 365 administrator to approve UnleashX. |
| **Email not found** | The message moved, was deleted, or your search terms were too narrow. | Ask the agent to list recent emails or broaden the search. |
| **Send failed / recipient rejected** | An invalid recipient address or an org mail policy blocked it. | Verify the recipient address and check your organization's mail rules. |
For general MCP issues, see [/mcp/integrations](/mcp/integrations).
## 9. Frequently asked questions
**Is my email data stored by UnleashX?**
No. UnleashX accesses your mailbox live through Microsoft Graph to perform each request. It doesn't keep a copy of your inbox.
**Can multiple team members connect their own Outlook?**
Yes. Each person authorizes their own Microsoft account, so the agent acts on each user's own mailbox with their own permissions.
**Do I ever need to re-authenticate?**
Usually not — `offline_access` keeps the connection refreshed. If Microsoft revokes the session (password change, MFA reset, or admin policy), just reconnect.
**Can the agent send email as someone else?**
No. It can only send as the account you signed in with.
## 10. References
* Microsoft Graph mail overview: [https://learn.microsoft.com/en-us/graph/api/resources/mail-api-overview](https://learn.microsoft.com/en-us/graph/api/resources/mail-api-overview)
* Microsoft Graph permissions reference: [https://learn.microsoft.com/en-us/graph/permissions-reference](https://learn.microsoft.com/en-us/graph/permissions-reference)
* Manage app access / revoke (personal): [https://account.microsoft.com/privacy/app-access](https://account.microsoft.com/privacy/app-access)
* Microsoft sign-in: [https://login.microsoftonline.com](https://login.microsoftonline.com)